Draft Documentation
This guide is currently in development. Content may be incomplete or subject to change.
Building AI Flows
Create multichannel campaigns using the visual flow builder. Learn to configure Voice and WhatsApp channels, upload datasets, and run automated outreach.
In this guide
Understanding Flow Campaigns
A flow campaign combines a visual workflow (the "flow") with communication channels and a dataset of contacts. Campaigns can use multiple channels simultaneously for true multichannel outreach.
Draft
Building and configuring. Not yet ready to execute.
Active
Ready to run. Channels and datasets configured.
Completed
All executions finished. View results in reports.
Multichannel Support
Send messages, templates, and wait for responses via WhatsApp Business API.
Voice
AI-powered voice calls with natural conversation, recording, and call transfers.
Creating a New Campaign
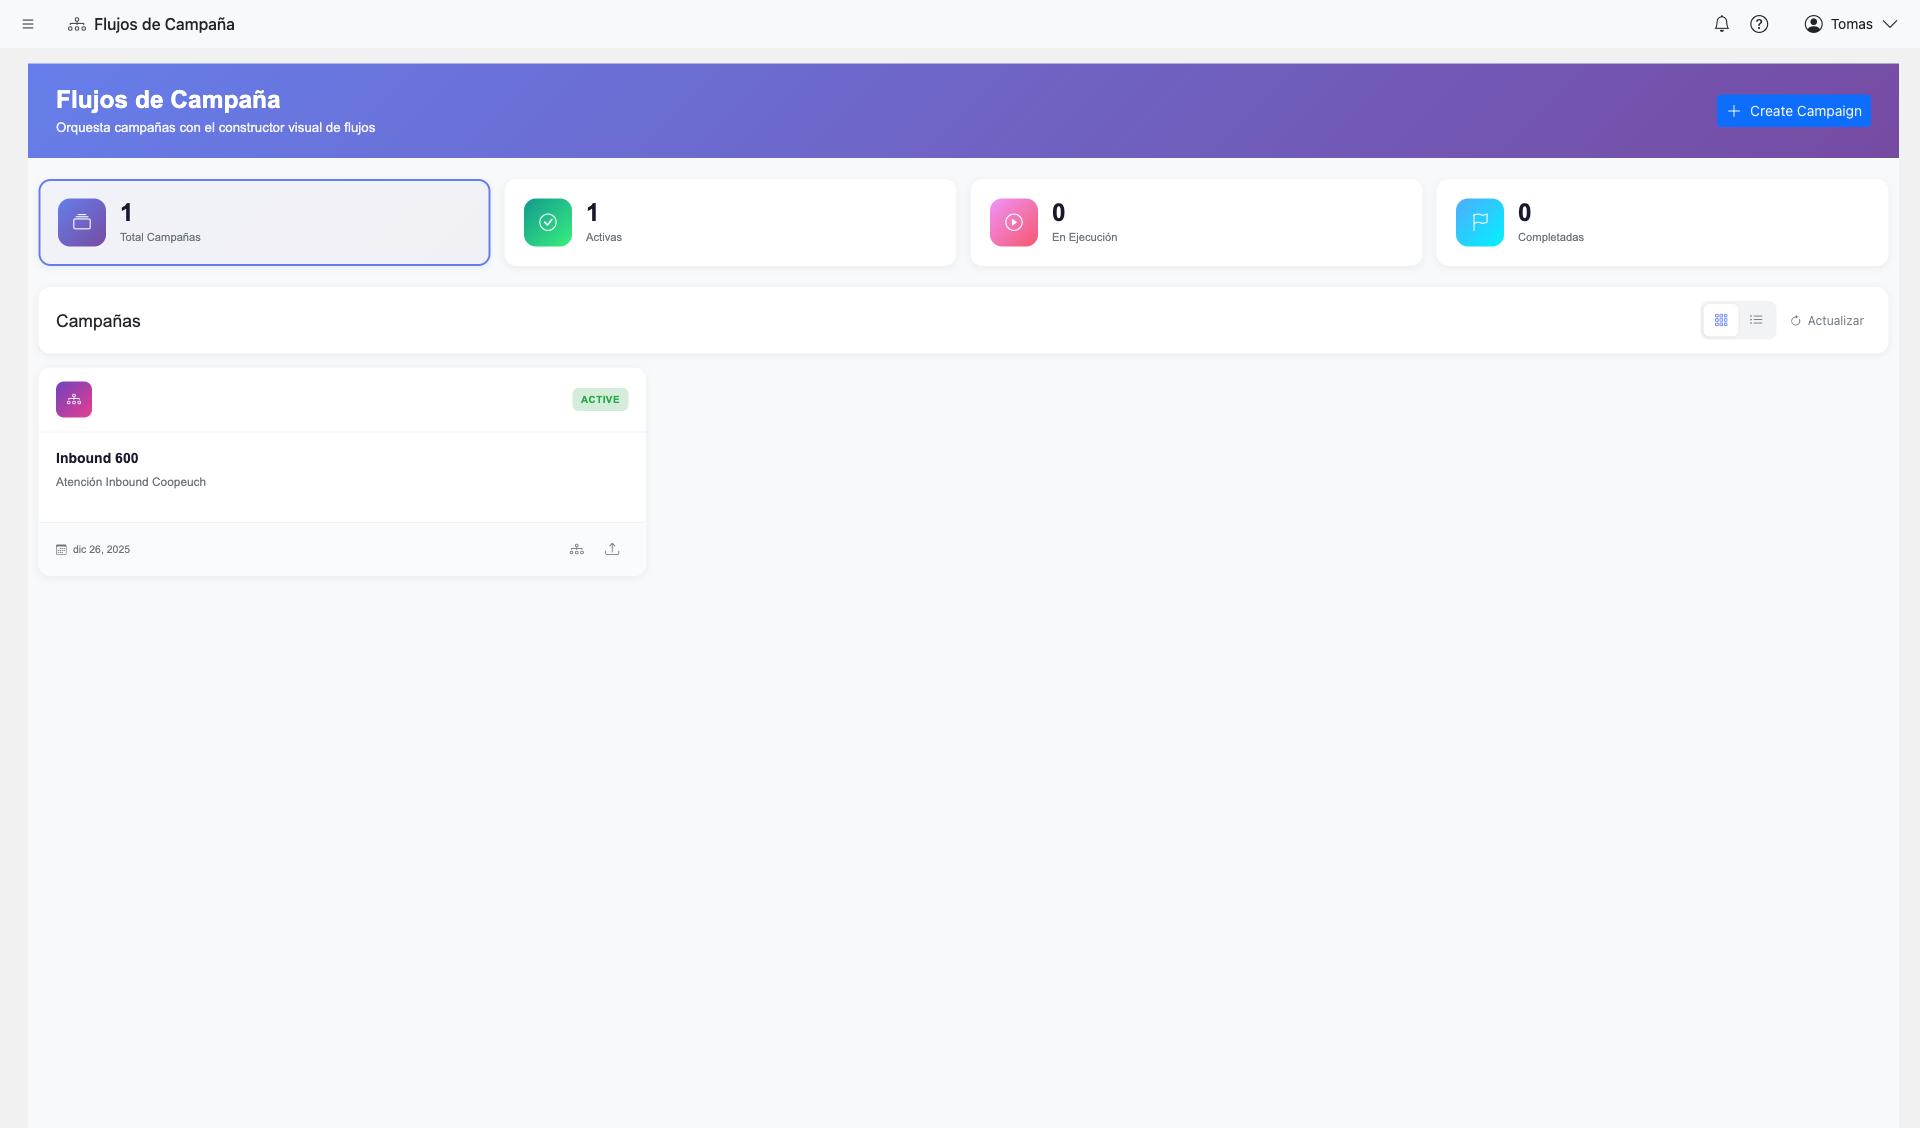
Steps:
- Navigate to AI Flows from the sidebar
- Click "Create Campaign" button
- Enter a campaign name and description
- Set the start and end dates (optional)
- Click "Create" to save and open the campaign
New campaign creation form
Screenshot coming soon
Tip: Use descriptive names like "Q1 Customer Feedback - Voice" or "Appointment Reminders - WhatsApp" to easily identify campaigns later.
Building the Flow
The flow builder provides a visual canvas where you drag and connect steps to define your campaign logic.
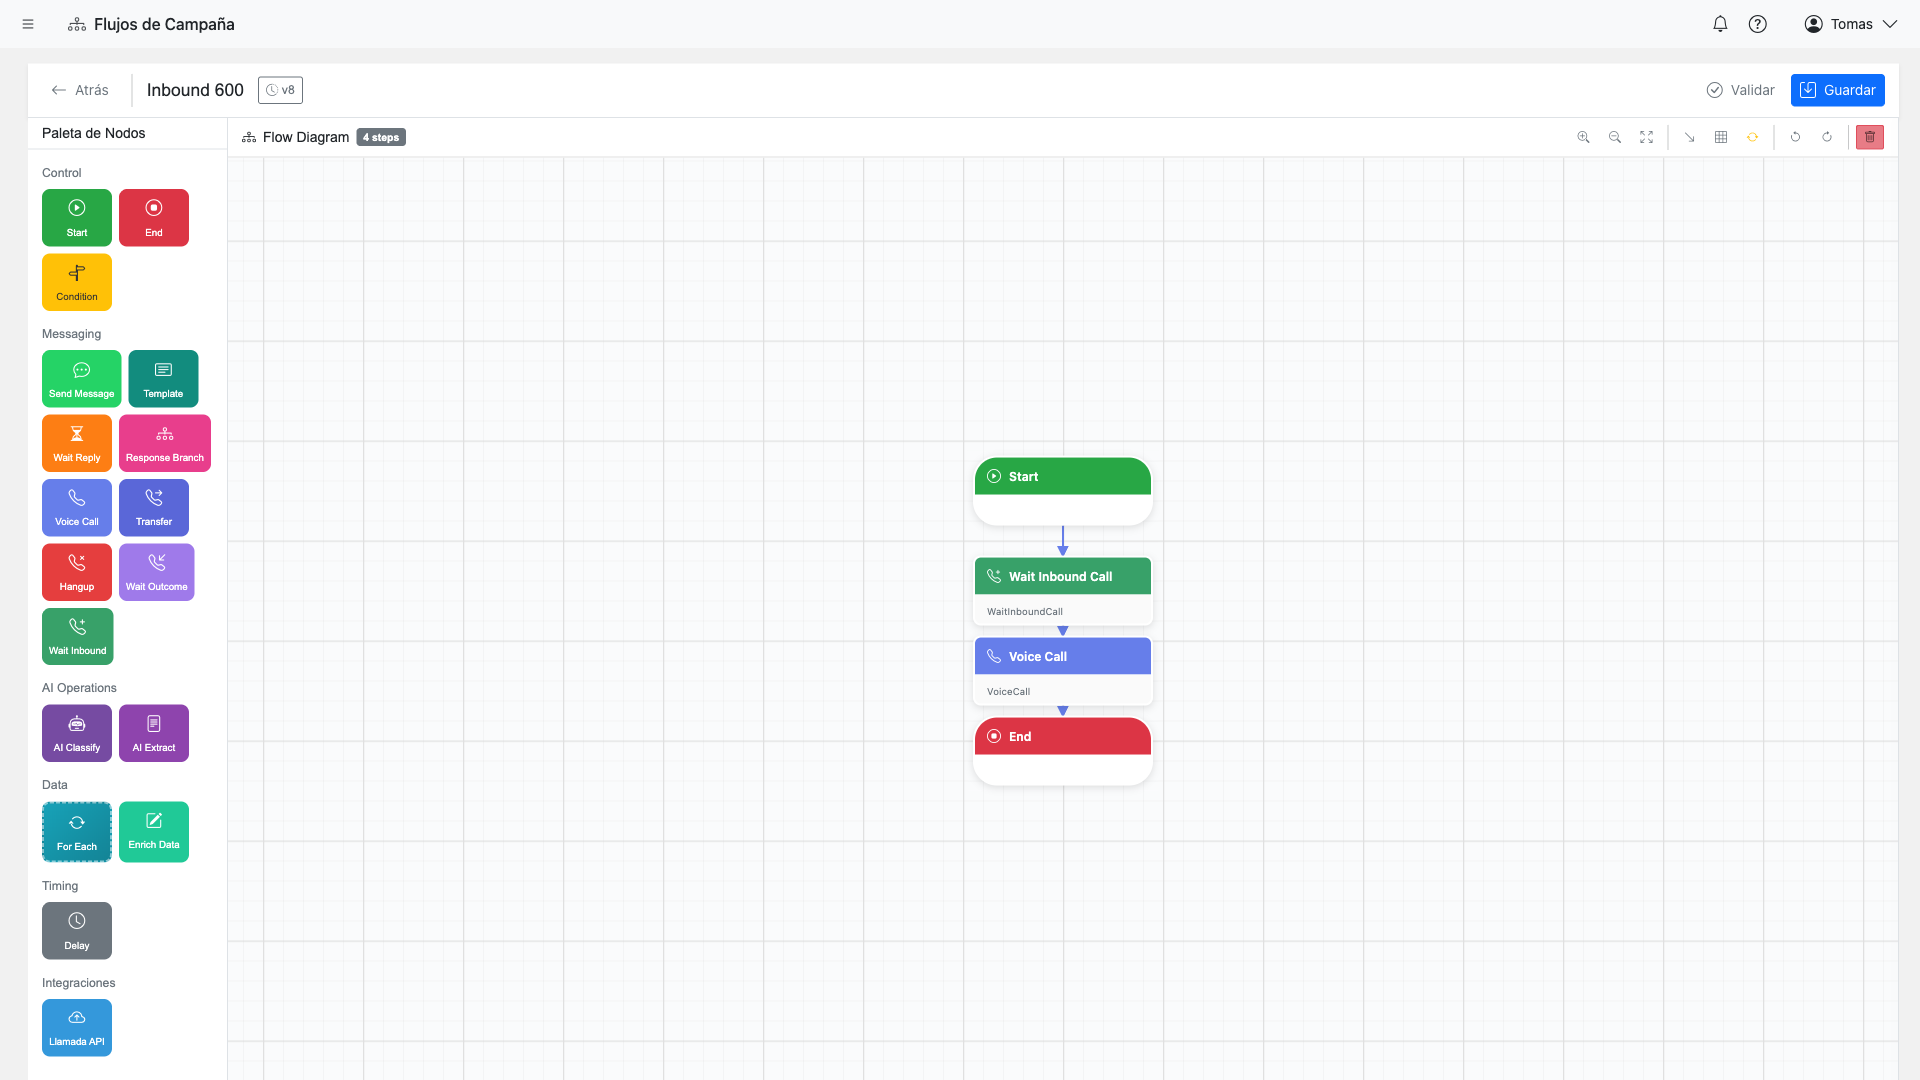
Available Step Types
WhatsApp Steps
Send a custom text message via WhatsApp
Send a pre-approved WhatsApp template with variables
Wait for and capture customer's WhatsApp reply
Voice Steps
Initiate an AI-powered outbound voice call
Wait for an inbound call on assigned DID
Transfer active call to agent or external number
Connecting Steps
- Drag a step from the palette onto the canvas
- Click the output port (circle) of one step
- Drag to the input port of the next step
- Configure each step by clicking on it
Configuring WhatsApp Channel
To use WhatsApp in your campaign, you need to assign a WhatsApp channel and configure your message templates.
Assigning the Channel:
- Open your campaign and go to the Channels tab
- Click "Add Channel"
- Select WhatsApp as the channel type
- Choose an available WhatsApp Business number
- Save the channel assignment
WhatsApp channel assignment panel
Screenshot coming soon
Configuring a SendMessage Step:
- Channel: Select your assigned WhatsApp channel
- Message: Write your message text
- Variables: Use
{{column_name}}to insert data from your dataset

Note: For sending the first message to a new contact, you must use a pre-approved SendTemplate step. Custom messages are only allowed in active conversation windows.
Configuring Voice Channel
Voice campaigns use AI-powered calls with natural language conversation capabilities. Configure your voice channel and customize the AI behavior.
Assigning the Channel:
- Open your campaign and go to the Channels tab
- Click "Add Channel"
- Select Voice as the channel type
- Choose an available DID (phone number)
- Save the channel assignment
Voice/DID channel assignment panel
Screenshot coming soon
Configuring a VoiceCall Step:
Instructions for the AI agent (e.g., "You are a friendly customer service rep...")
Choose the AI voice: alloy, echo, fable, onyx, nova, or shimmer
The first message spoken when the call connects
Enable call recording for quality assurance and auditing
Maximum call length in seconds (prevents runaway calls)

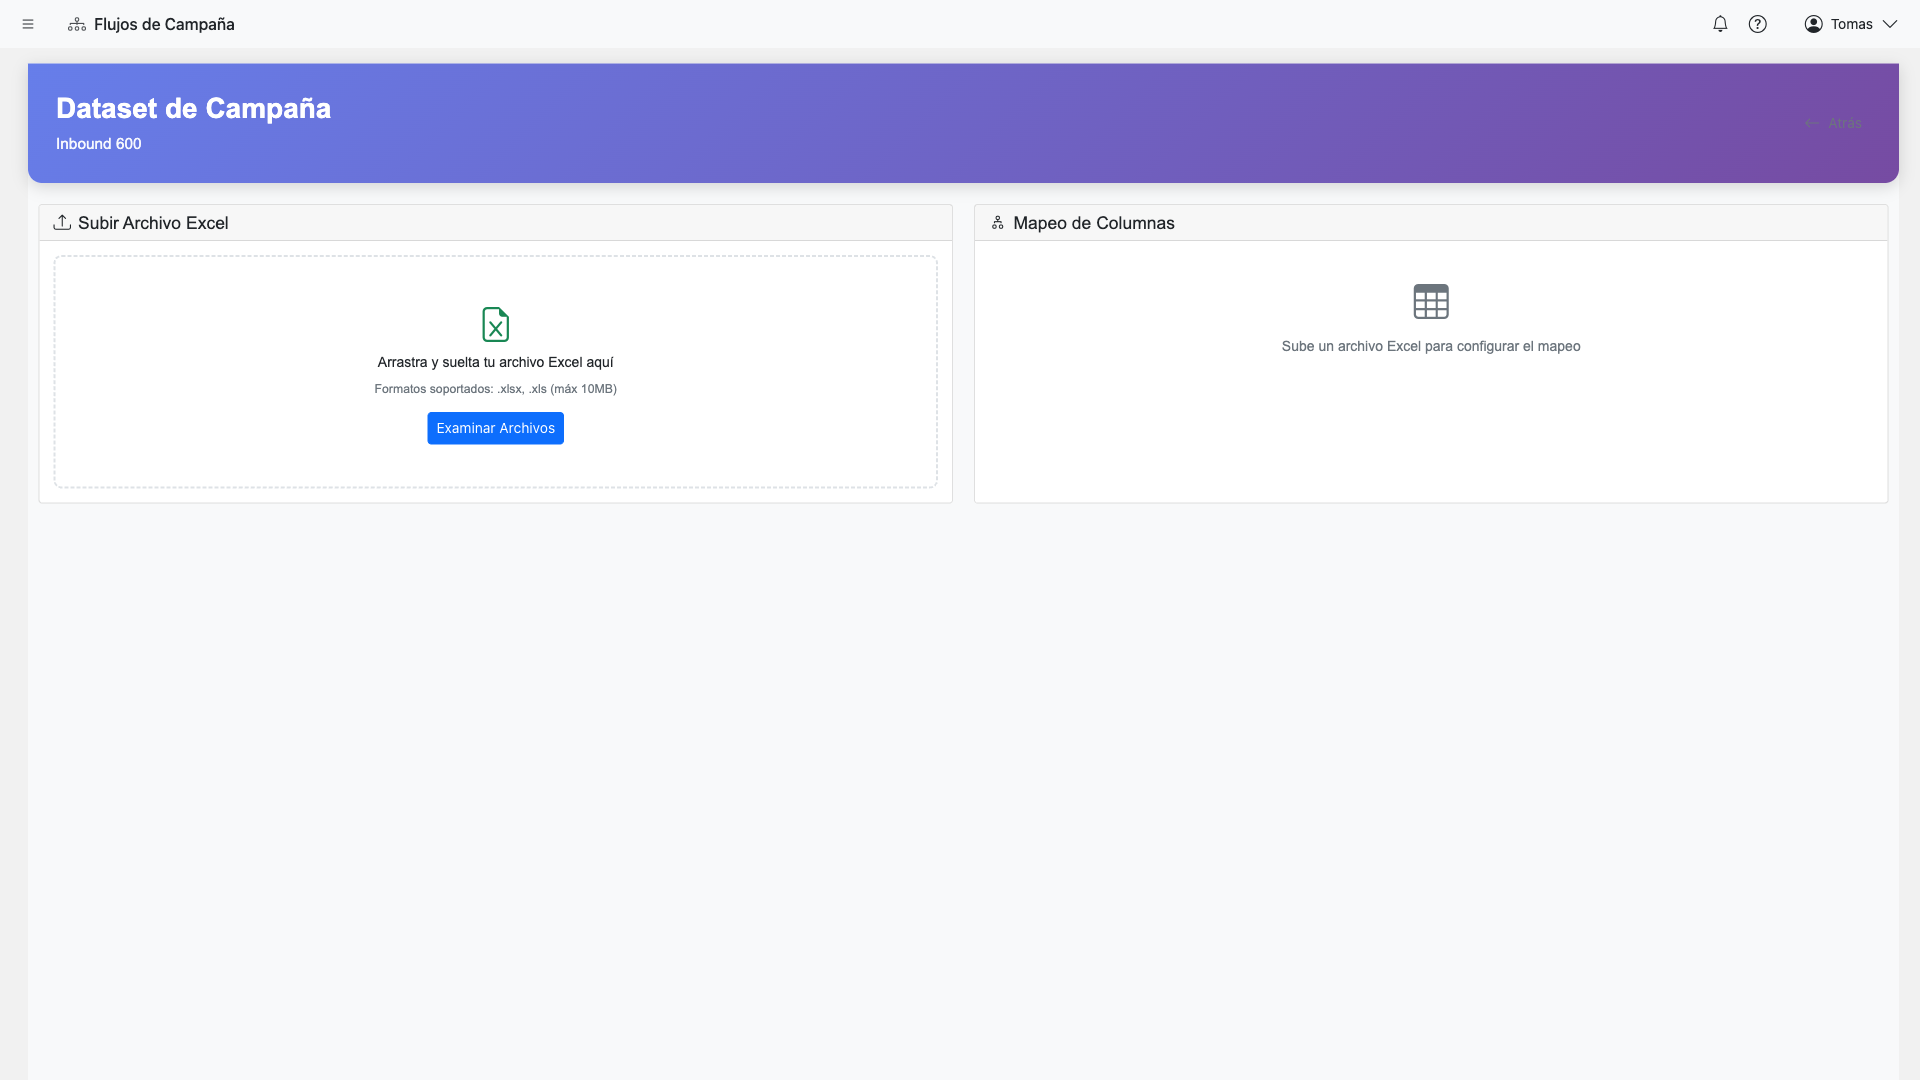
Uploading Your Dataset
The dataset contains your contact list and any data you want to use in your messages or as context for AI conversations.
Required: Your dataset must include a phone number column. This is used to reach contacts via WhatsApp or Voice.
Steps:
- Go to the Datasets tab in your campaign
- Click "Upload Dataset"
- Select a CSV file from your computer
- Map the Phone Number column (required)
- Optionally map identifier, name, and email columns
- Set the default country code if phone numbers don't include it
- Click "Process" to upload
CSV Format Example:
phone,name,company,appointment_date
+56912345678,Juan Garcia,Acme Corp,2024-03-15
+56987654321,Maria Lopez,Tech Inc,2024-03-16
Running the Campaign
Once your flow, channels, and dataset are configured, you can execute the campaign.
Pre-Execution Checklist:
- Flow has all required steps configured
- At least one channel is assigned
- Dataset is uploaded and processed
- Campaign status is "Active"
To Execute:
- Go to the Execution tab
- Select the dataset to process
- Review execution settings (batch size, delays)
- Click "Start Execution"
- Monitor progress in real-time
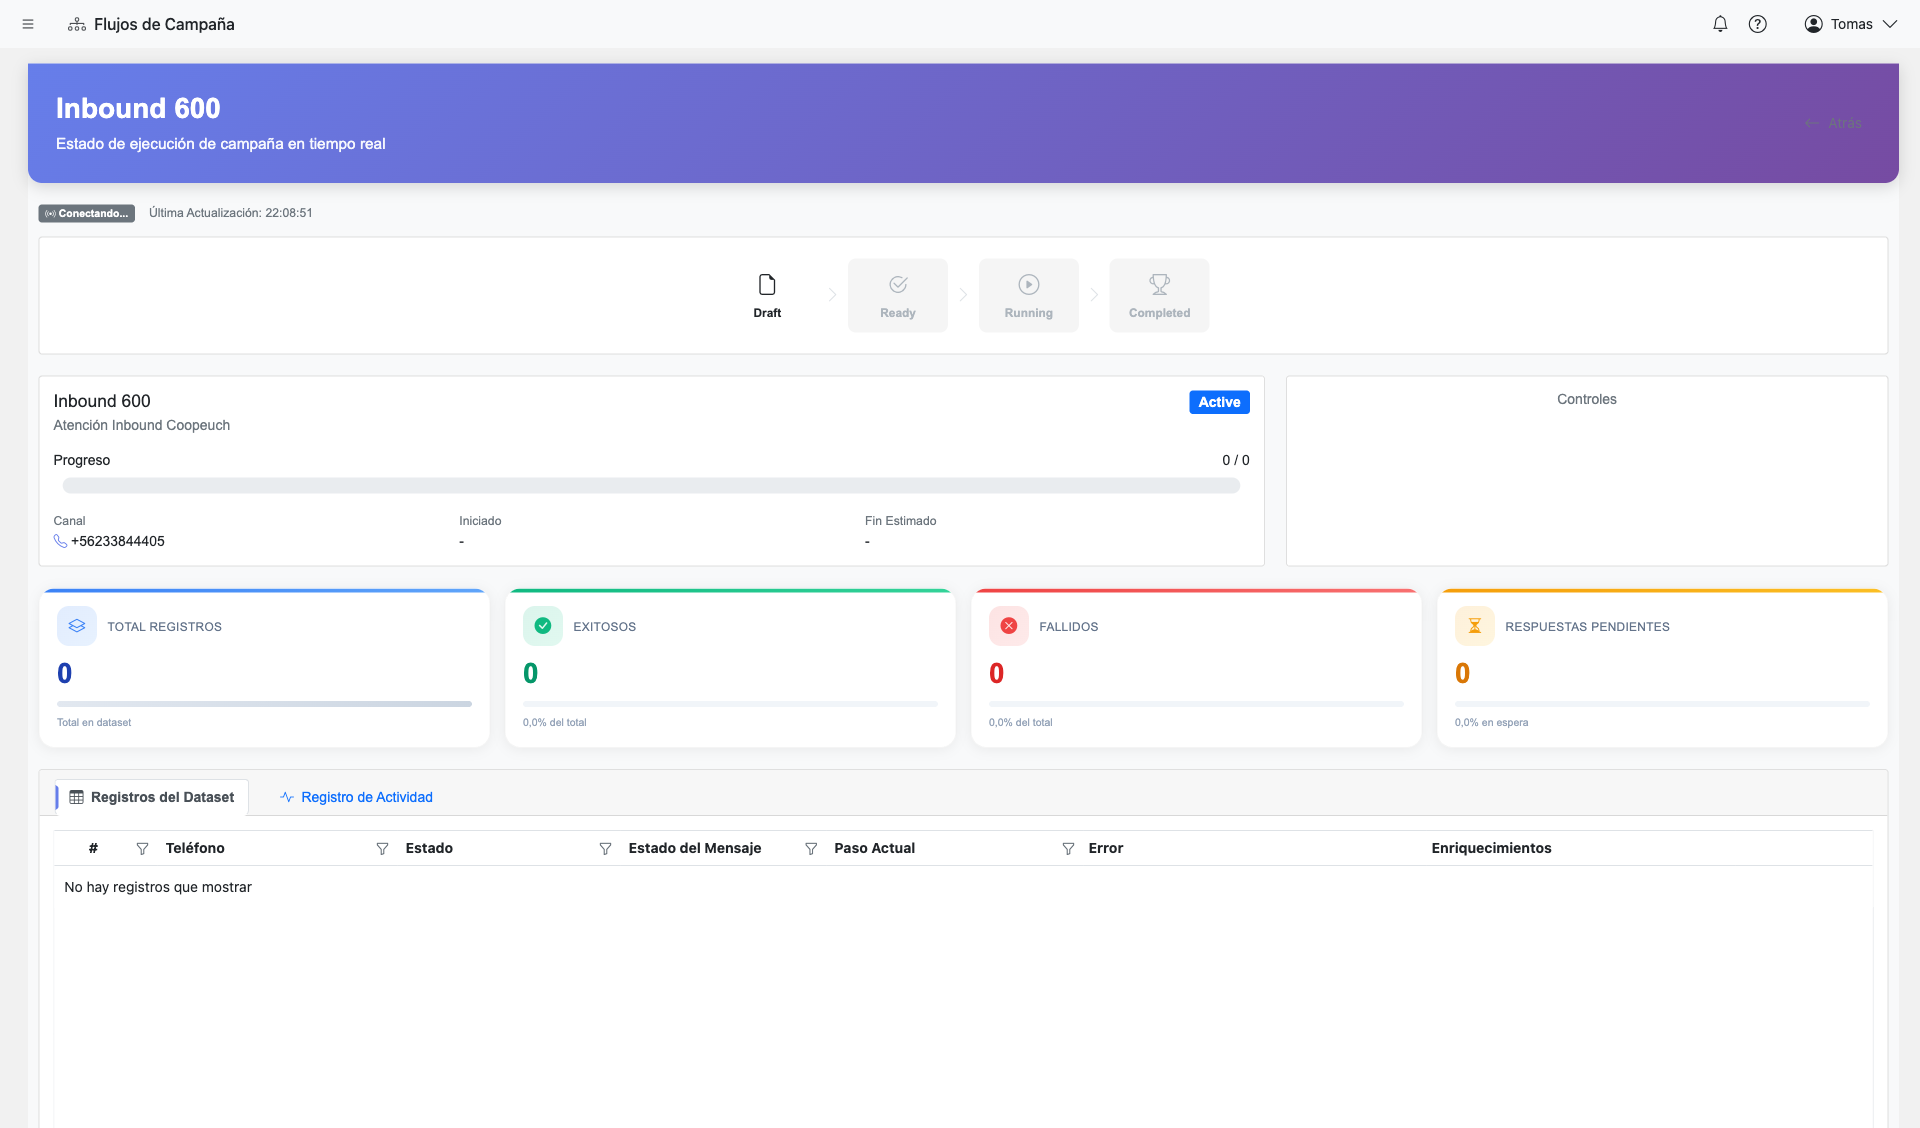
Important: You can pause or stop execution at any time. Rows that haven't been processed yet will remain in queue.
Viewing Reports
After execution, access detailed reports to analyze campaign performance by channel.
WhatsApp Metrics
- Messages sent / delivered / read
- Response rate
- Template performance
- Conversation outcomes
Voice Metrics
- Calls completed / failed
- Average call duration
- Transfer rate
- Outcome classification
Campaign report dashboard with metrics
Screenshot coming soon
Deep Dive Guides
Explore detailed documentation for each aspect of AI Flows:
Campaign Database
Persistent data storage, versioning, and lookups
~12 min read →Dataset Management
Upload, validation, execution tracking, and enrichment
~15 min read →Flow Steps Reference
Complete guide to all available step types
~20 min read →Voice Actions
AI actions during calls: transfers, lookups, authentication
~15 min read →API Integrations
Connect external APIs with credentials and mappings
~10 min read →