Draft Documentation
This guide is currently in development. Content may be incomplete or subject to change.
AI Agents
Create an AI agent that pulls data from contracts, review its settings and manage it from the agents list.
In this guide
What an AI agent does
An AI agent reads documents for you and pulls out the data you need, such as the customer's name, their RUT (Chilean tax ID) or a loan amount. In AI Agents you create the agent, review its settings and keep it as a draft until it is ready.
AI Agents shows in the menu when your plan includes it and your user has permission to see agents. If you don't see it, ask your account administrator.
The agents list
Open AI Agents in the menu. The list shows each agent with its type, status, executions, success rate and the date it was created. Below it, four cards count all agents, active agents, draft agents and all executions.
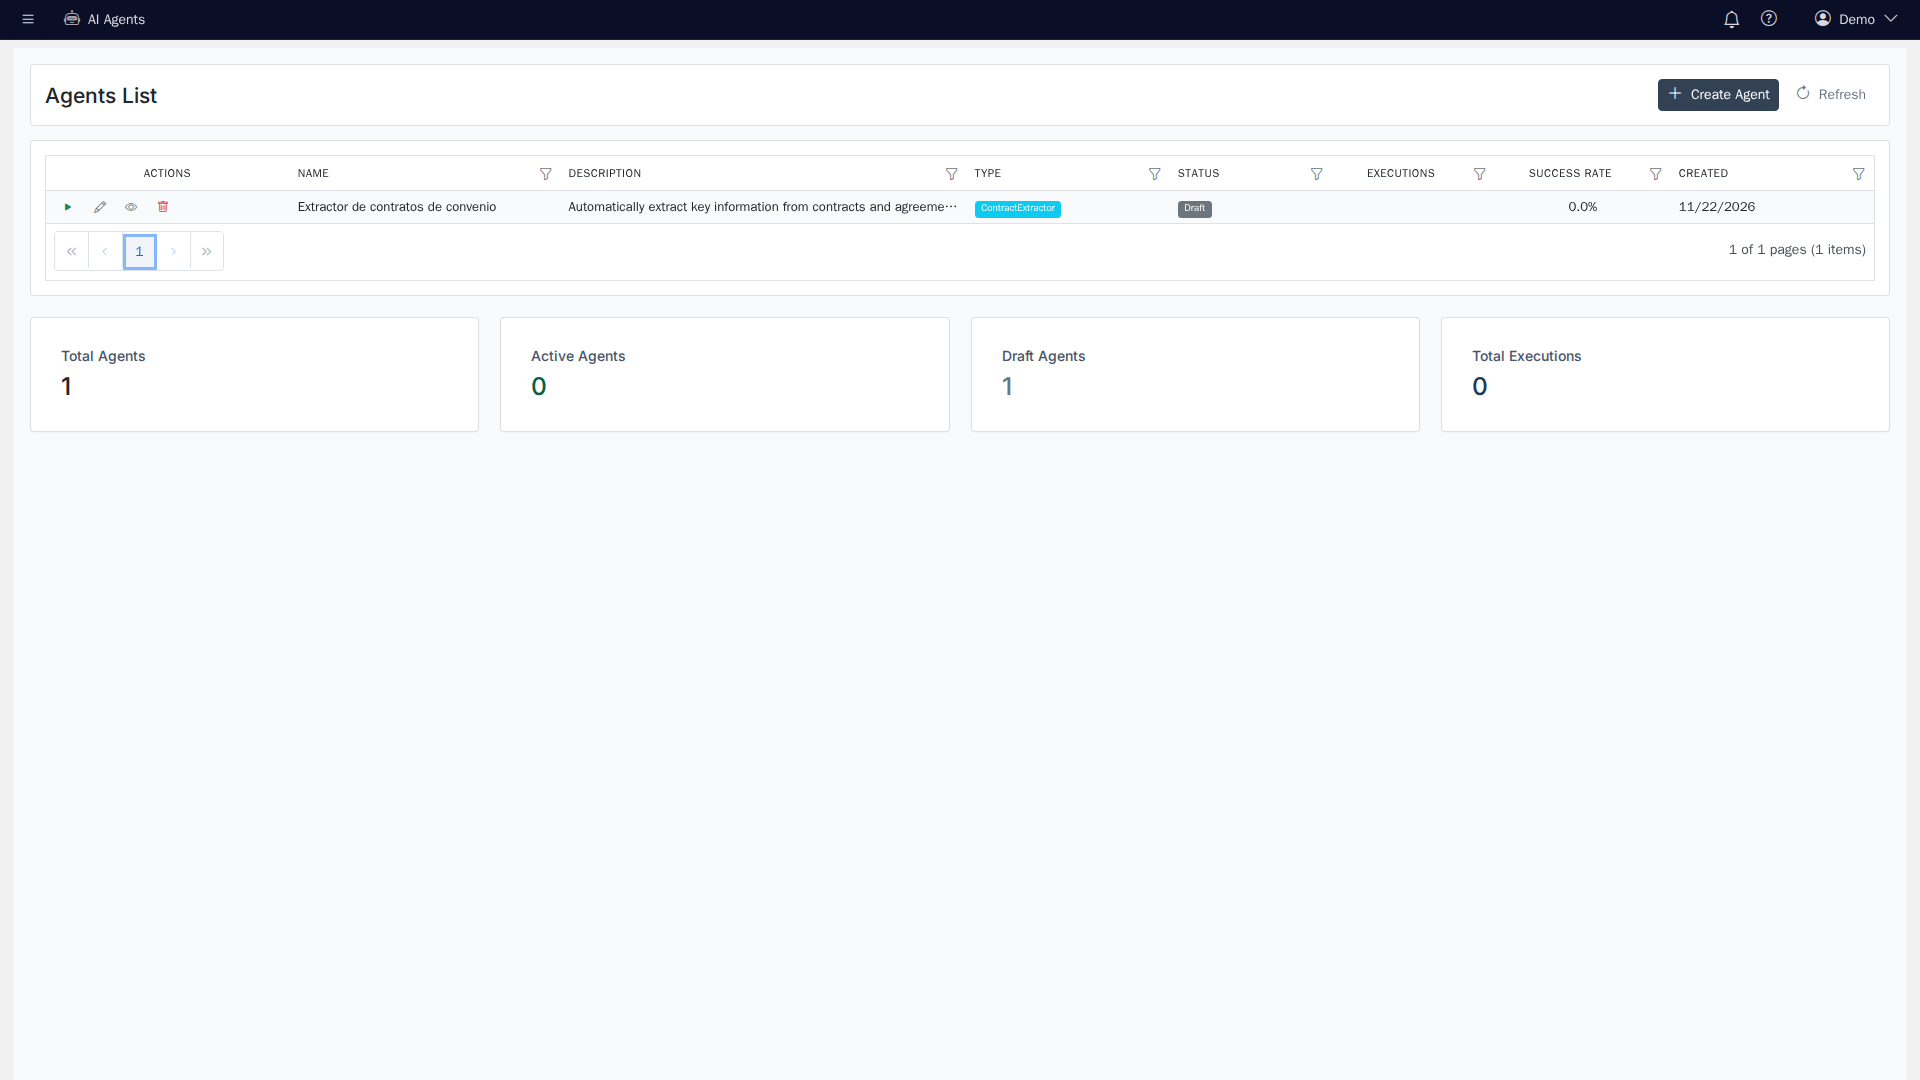
- The triangle activates the agent.
- The pencil opens the page to edit the agent.
- The eye opens the agent's details.
- The bin deletes the agent, after asking you to confirm.
Create an agent
Click Create Agent. A wizard takes you through four steps, numbered at the top of the page.
Step 1: Business goal
Choose the card that best describes what you want the agent to do and click Continue. To pull data from contracts, choose Contract Data Extractor.
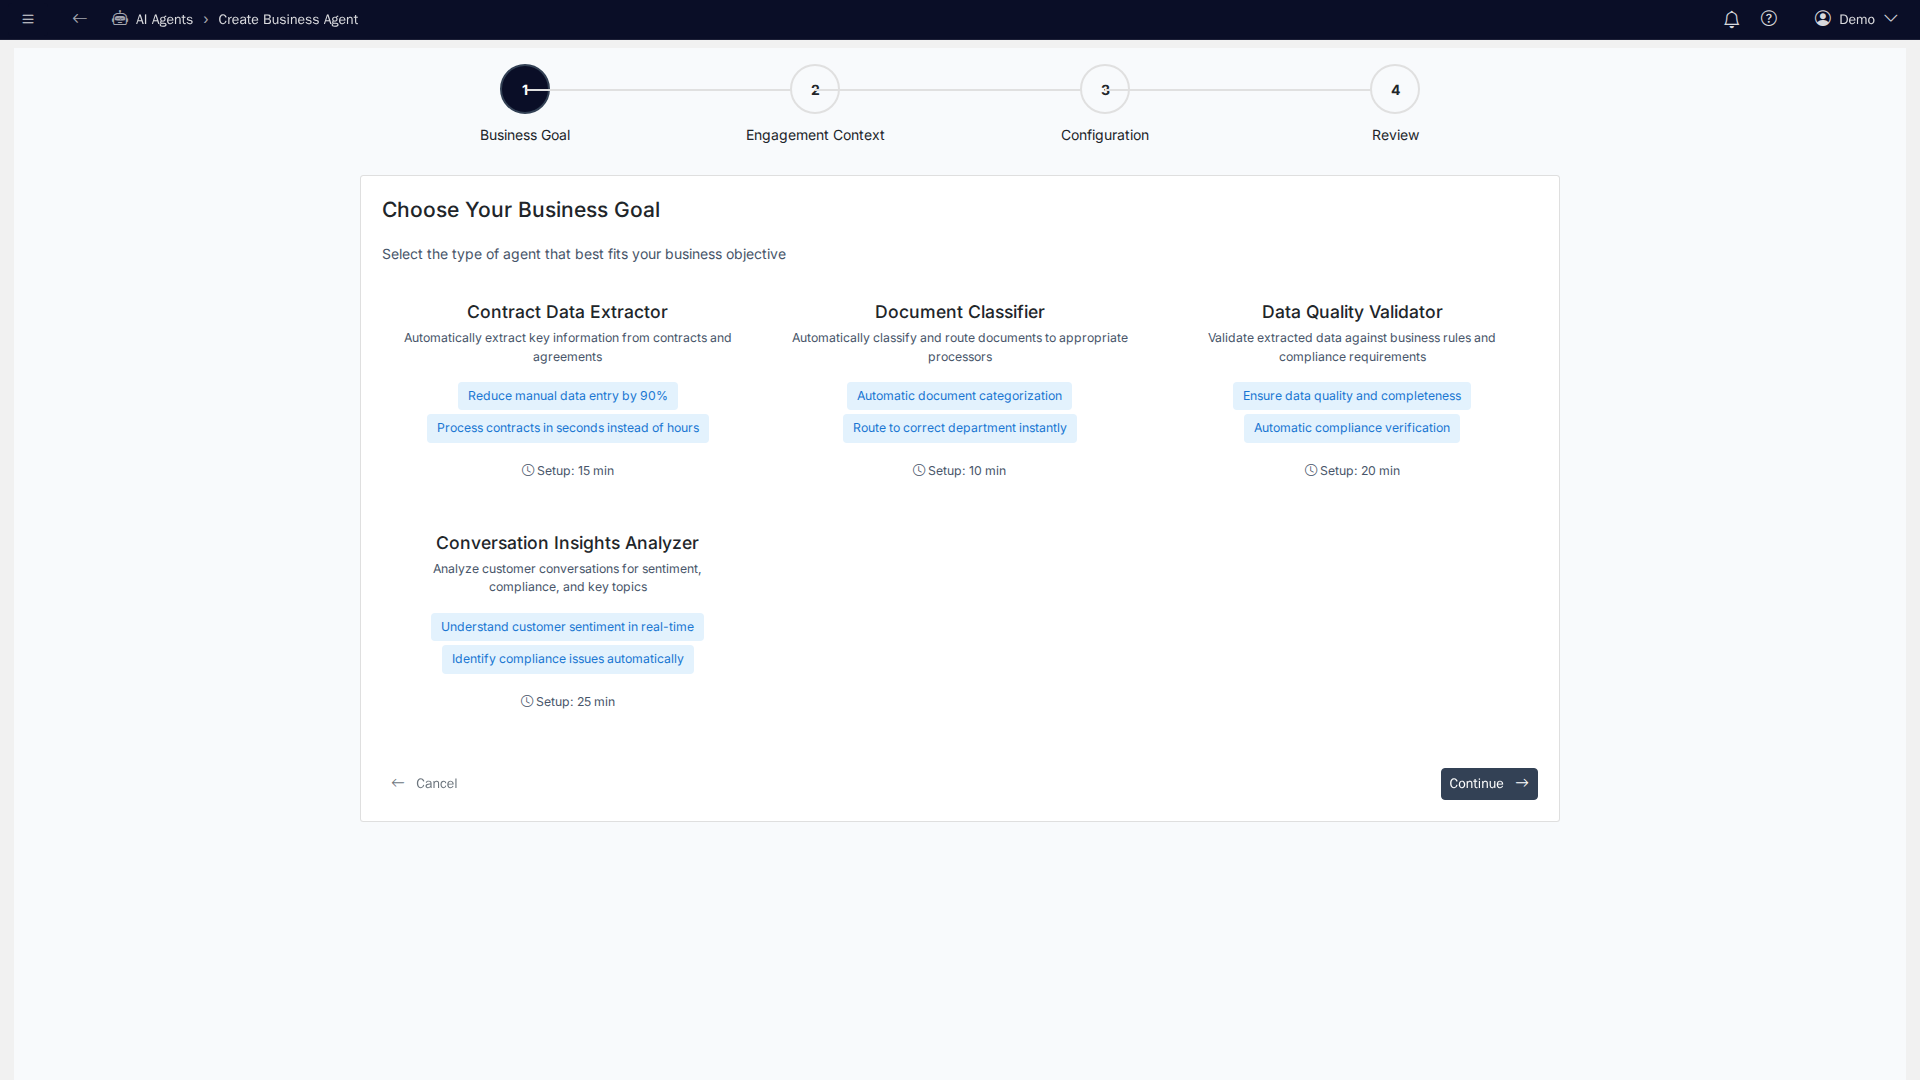
For now, the agent is created as a contract data extractor whichever card you choose.
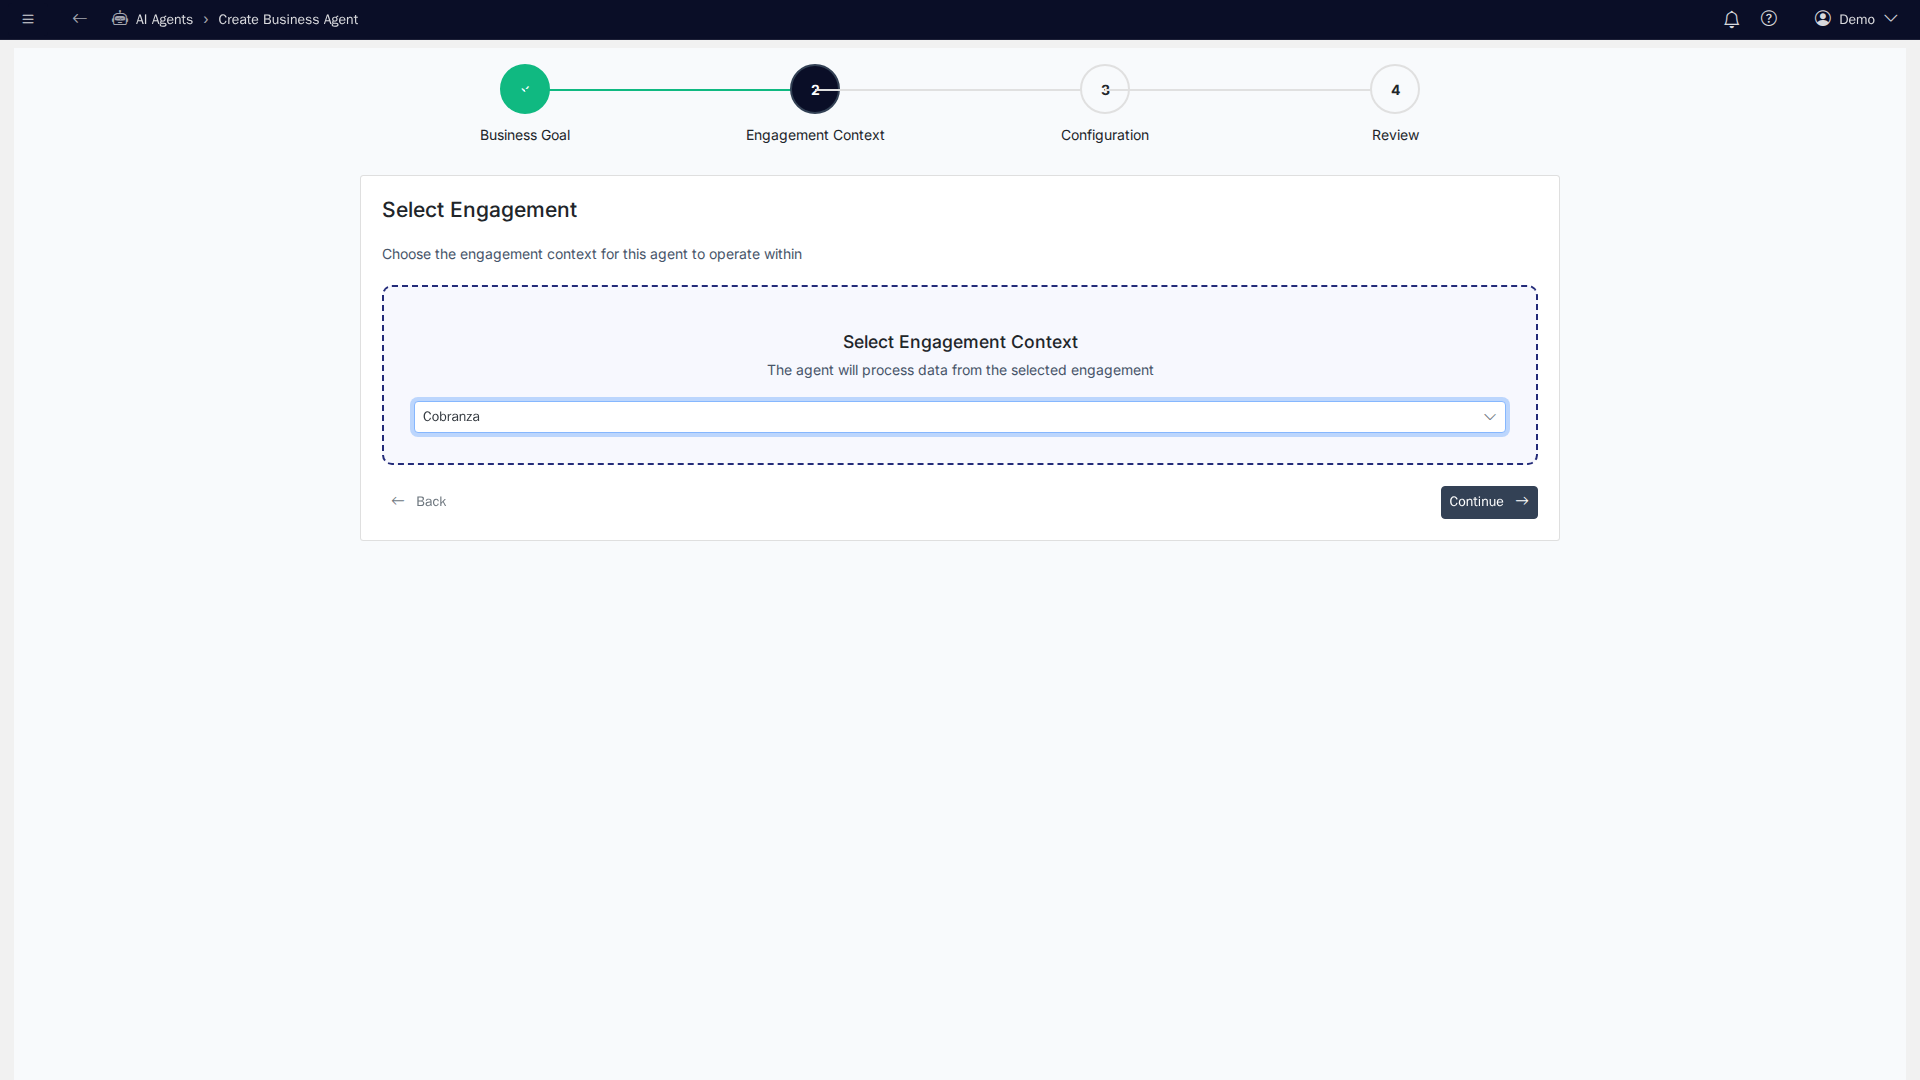
Step 2: Engagement context
Open the list and choose the engagement the agent will work for, for example Cobranza (collections). Then click Continue. The engagement you chose shows in the summary on the last step.
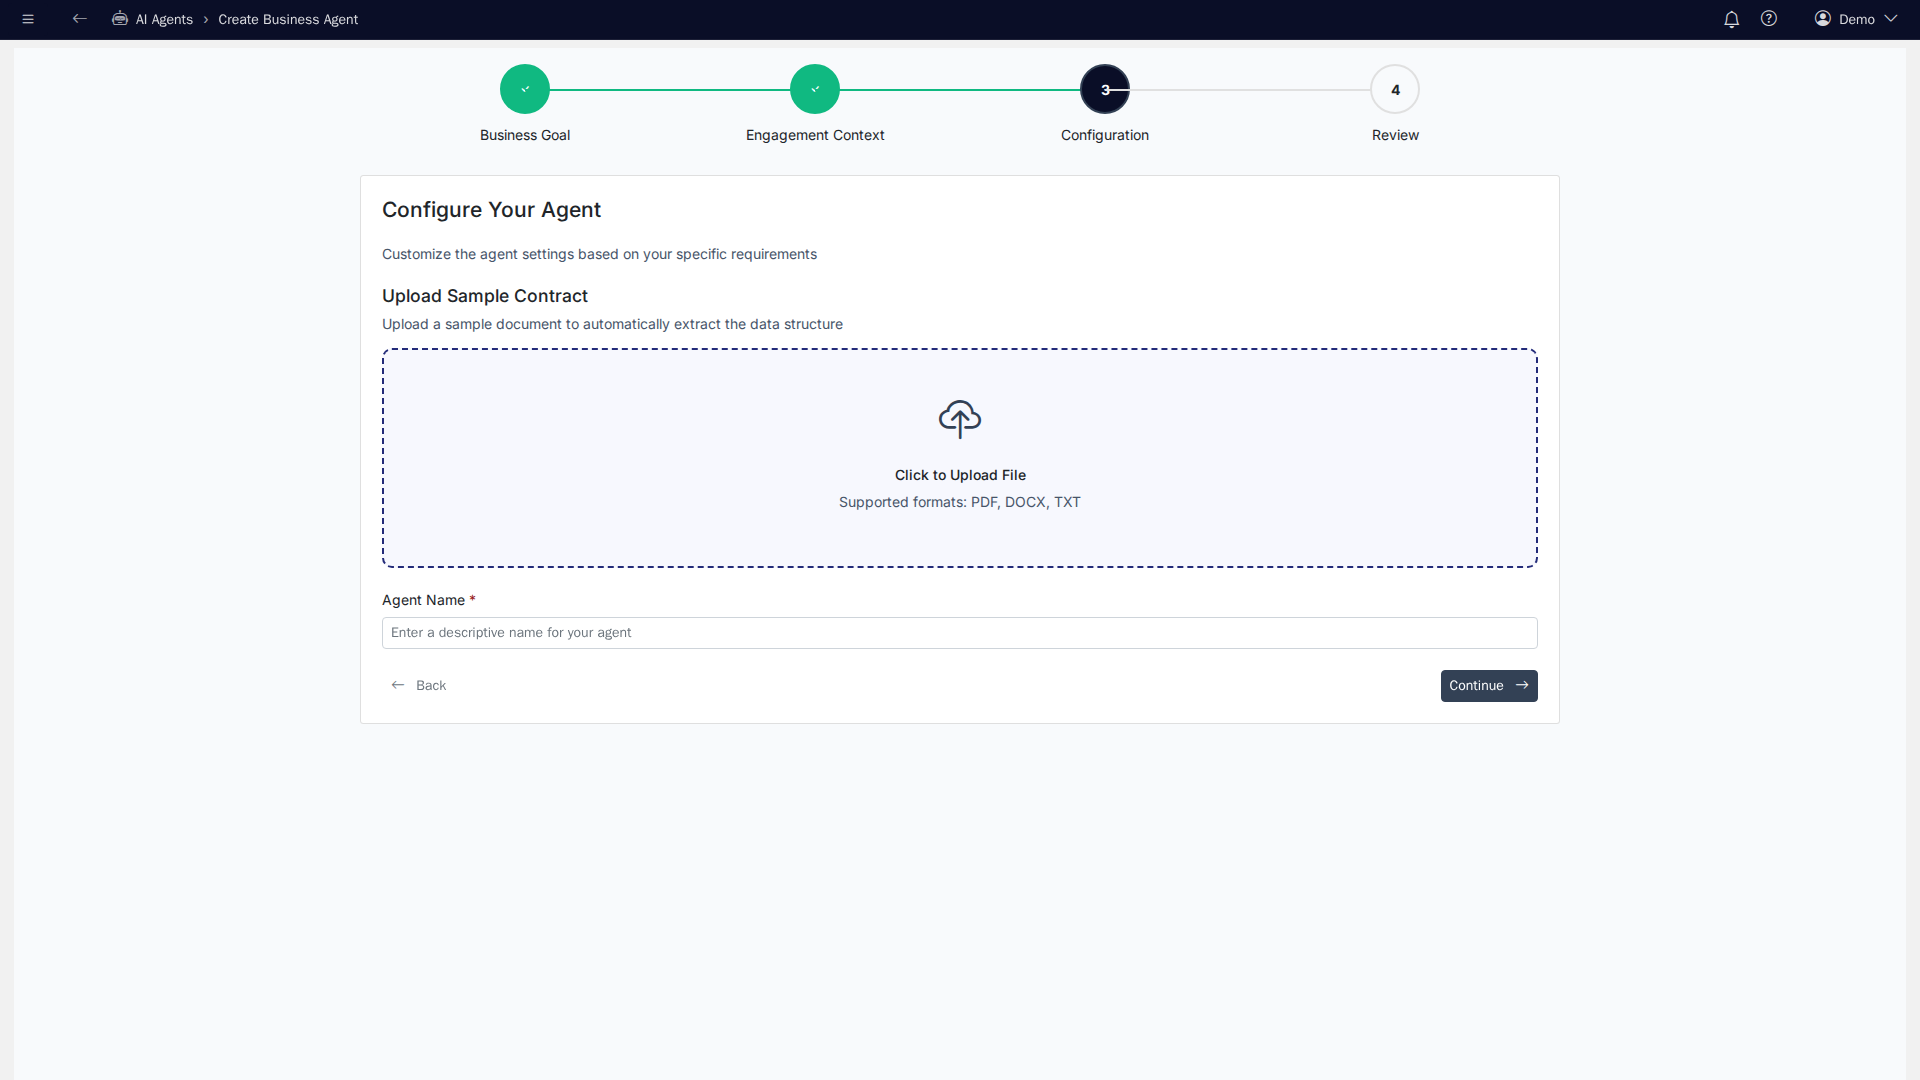
Step 3: Configuration
Click the Click to Upload File box and choose a sample contract as a PDF, DOCX or TXT file.
When the file is loaded, the page shows the fields the agent will pull out, grouped as customer information, product details and financial terms. Type a name for the agent in Agent Name and click Continue.
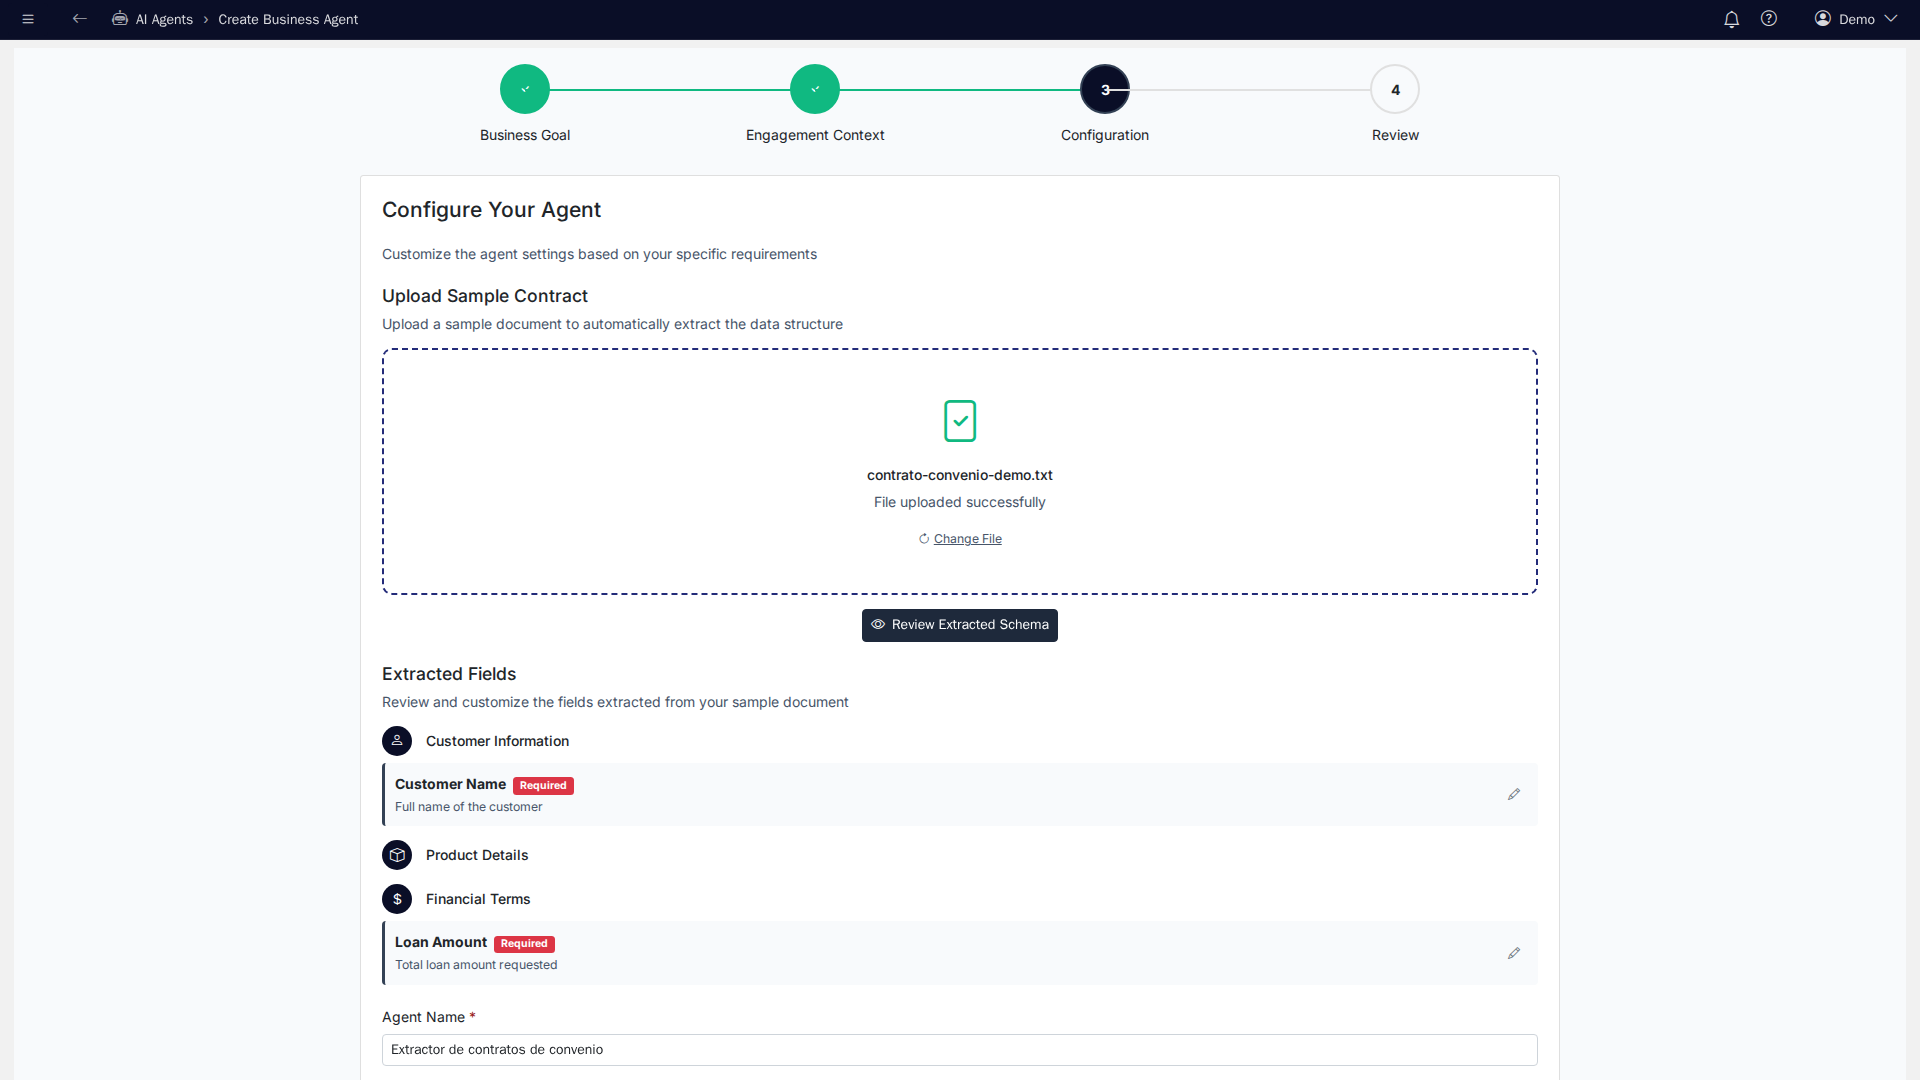
For now, the page proposes the same set of fields for any contract and doesn't keep the sample file. Use a sample contract without real customer data.
Step 4: Review and create
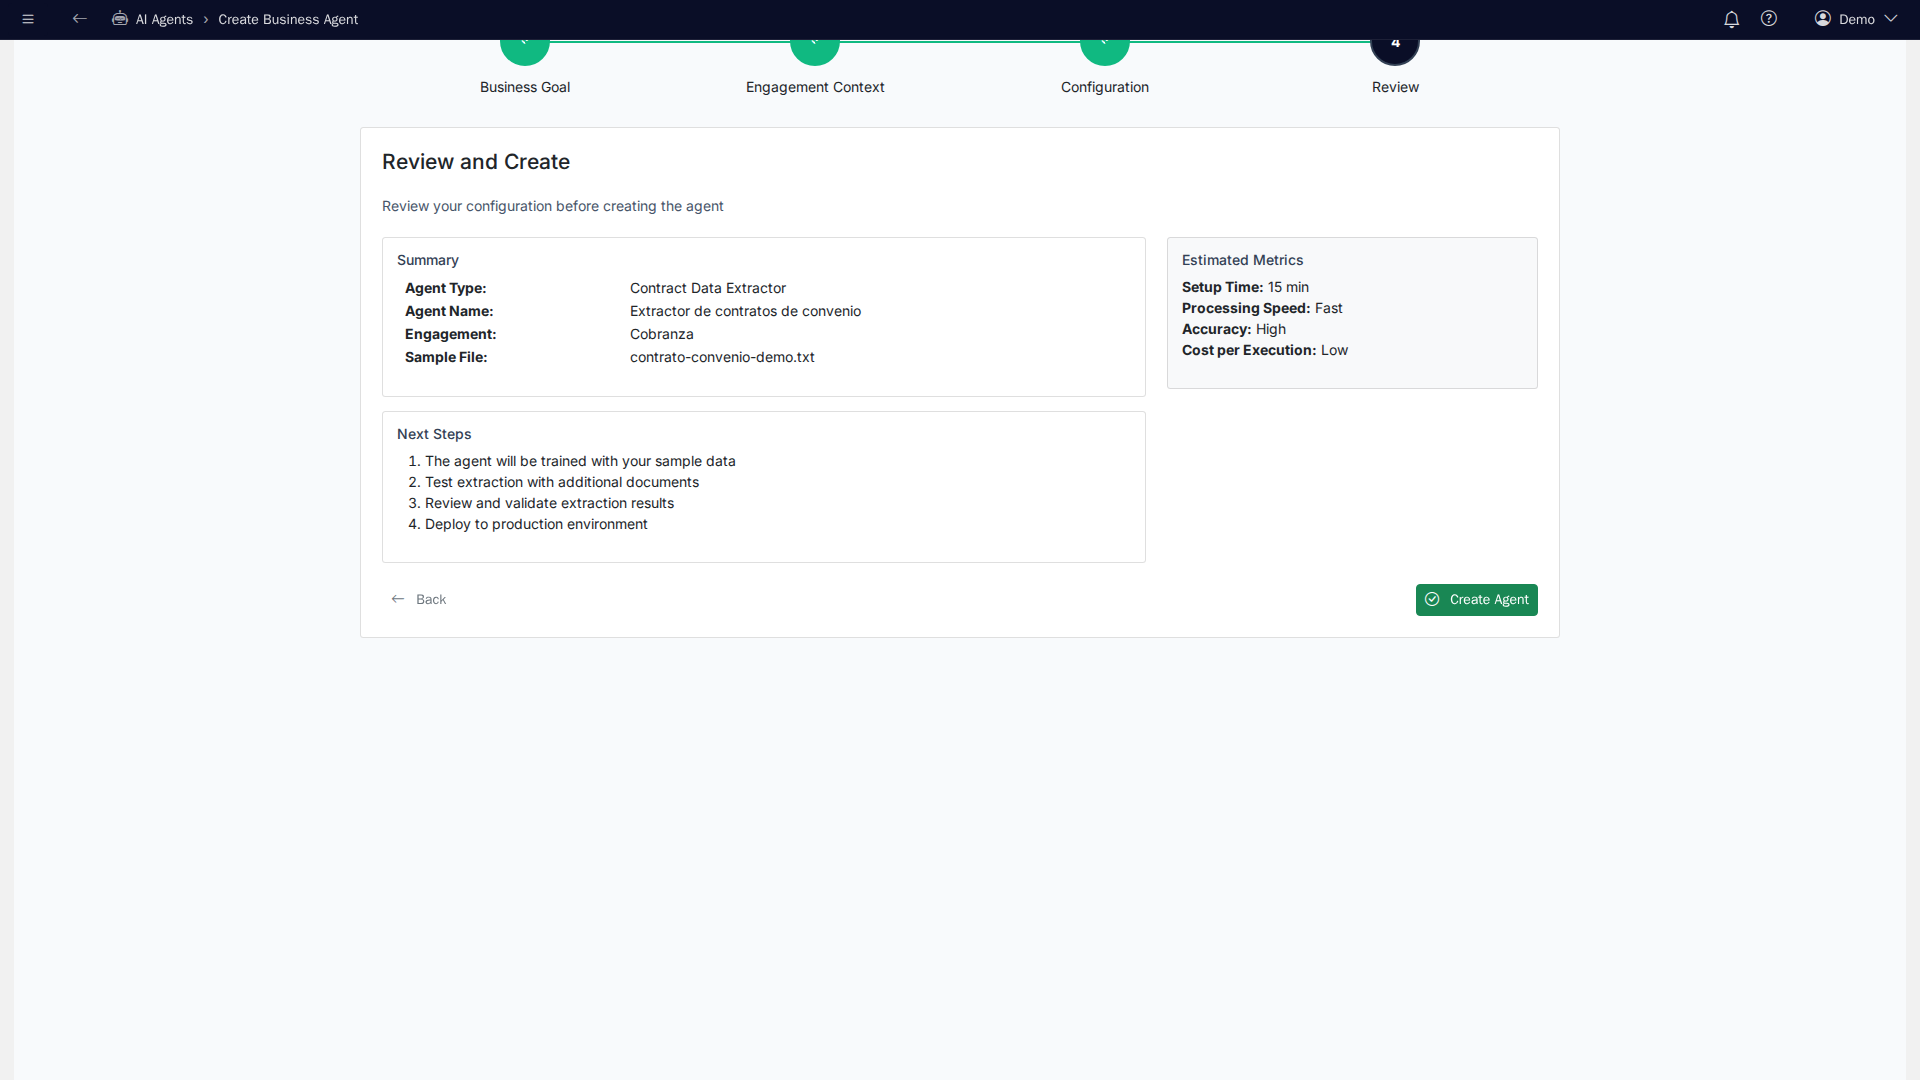
The summary shows the agent type, its name, the engagement and the sample file. If everything is right, click Create Agent. The agent is saved with the Draft status and shows in the list.
View an agent
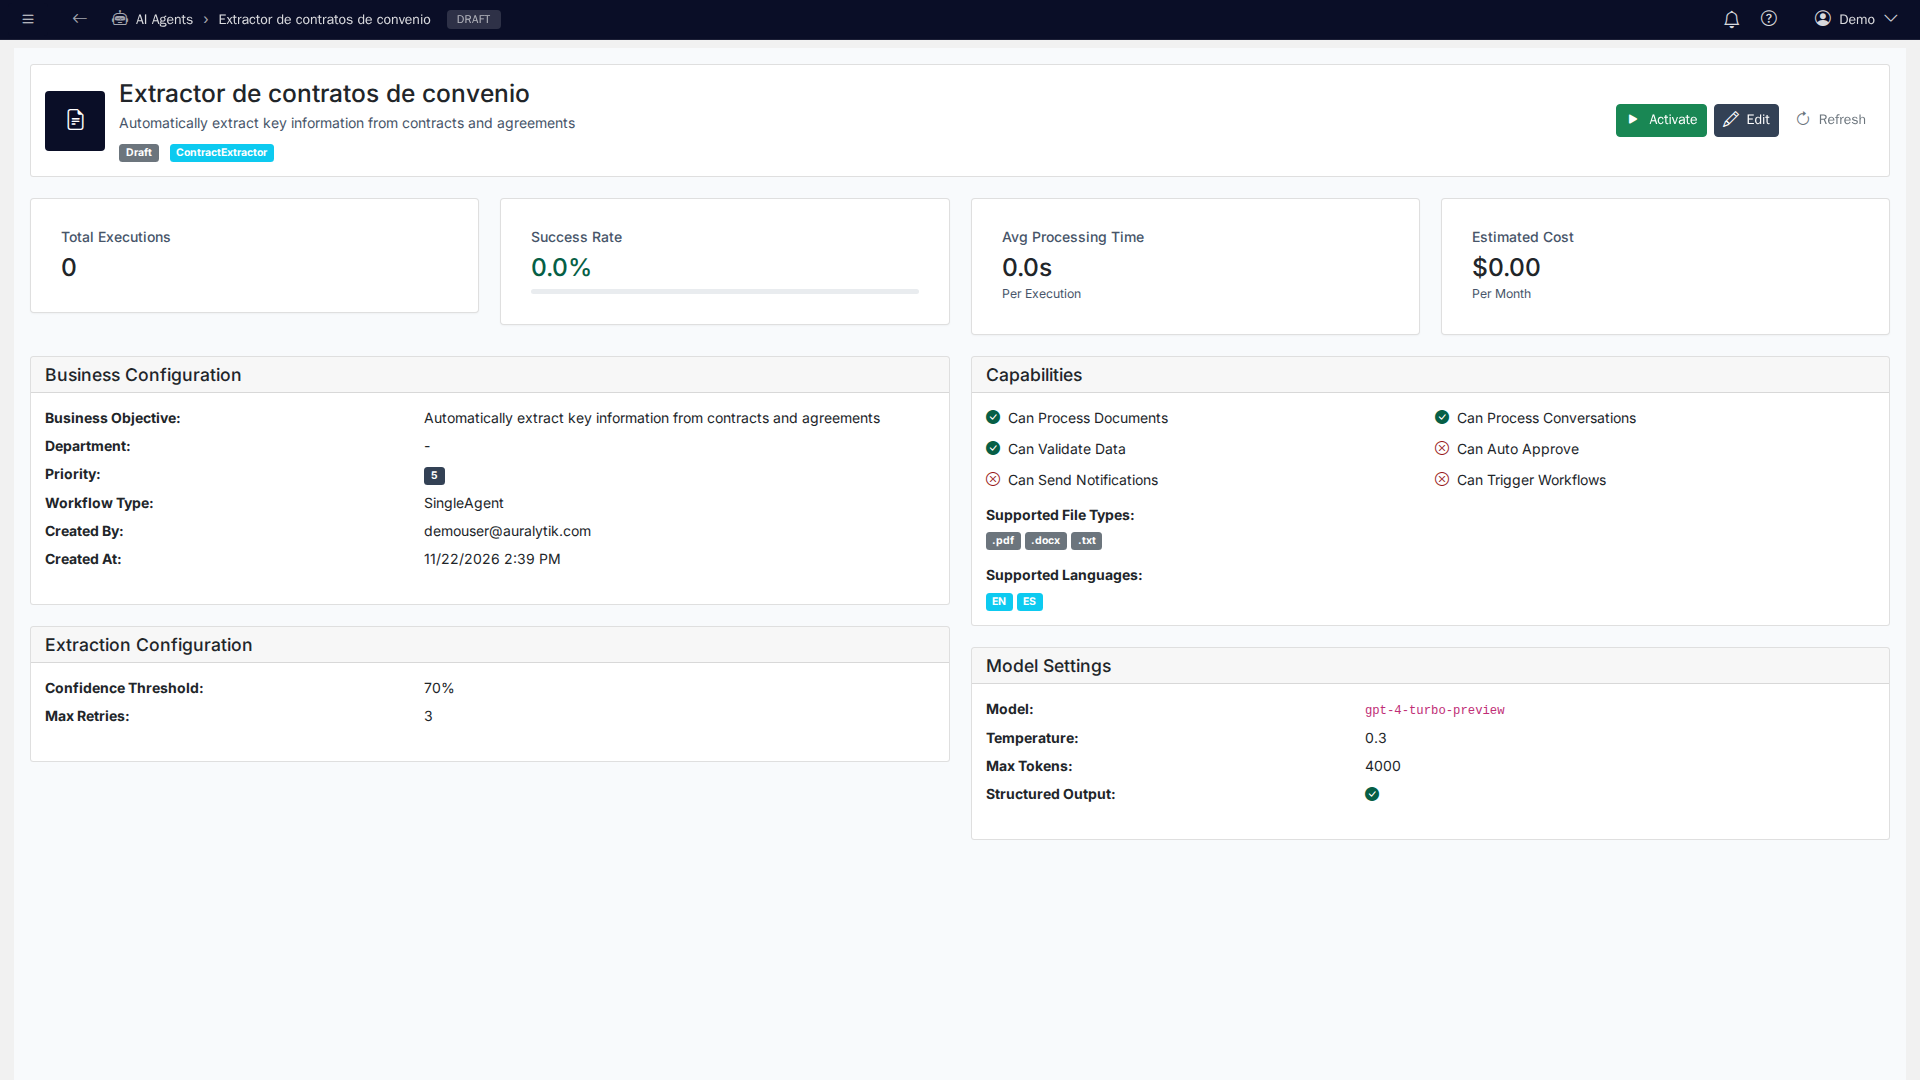
Click the eye in the list to open the details. At the top you see the executions, the success rate, the average time per execution and the estimated cost. Below are the business settings, the extraction settings, what the agent can do and the AI model it uses. From here you can Activate or Edit the agent.
Edit an agent
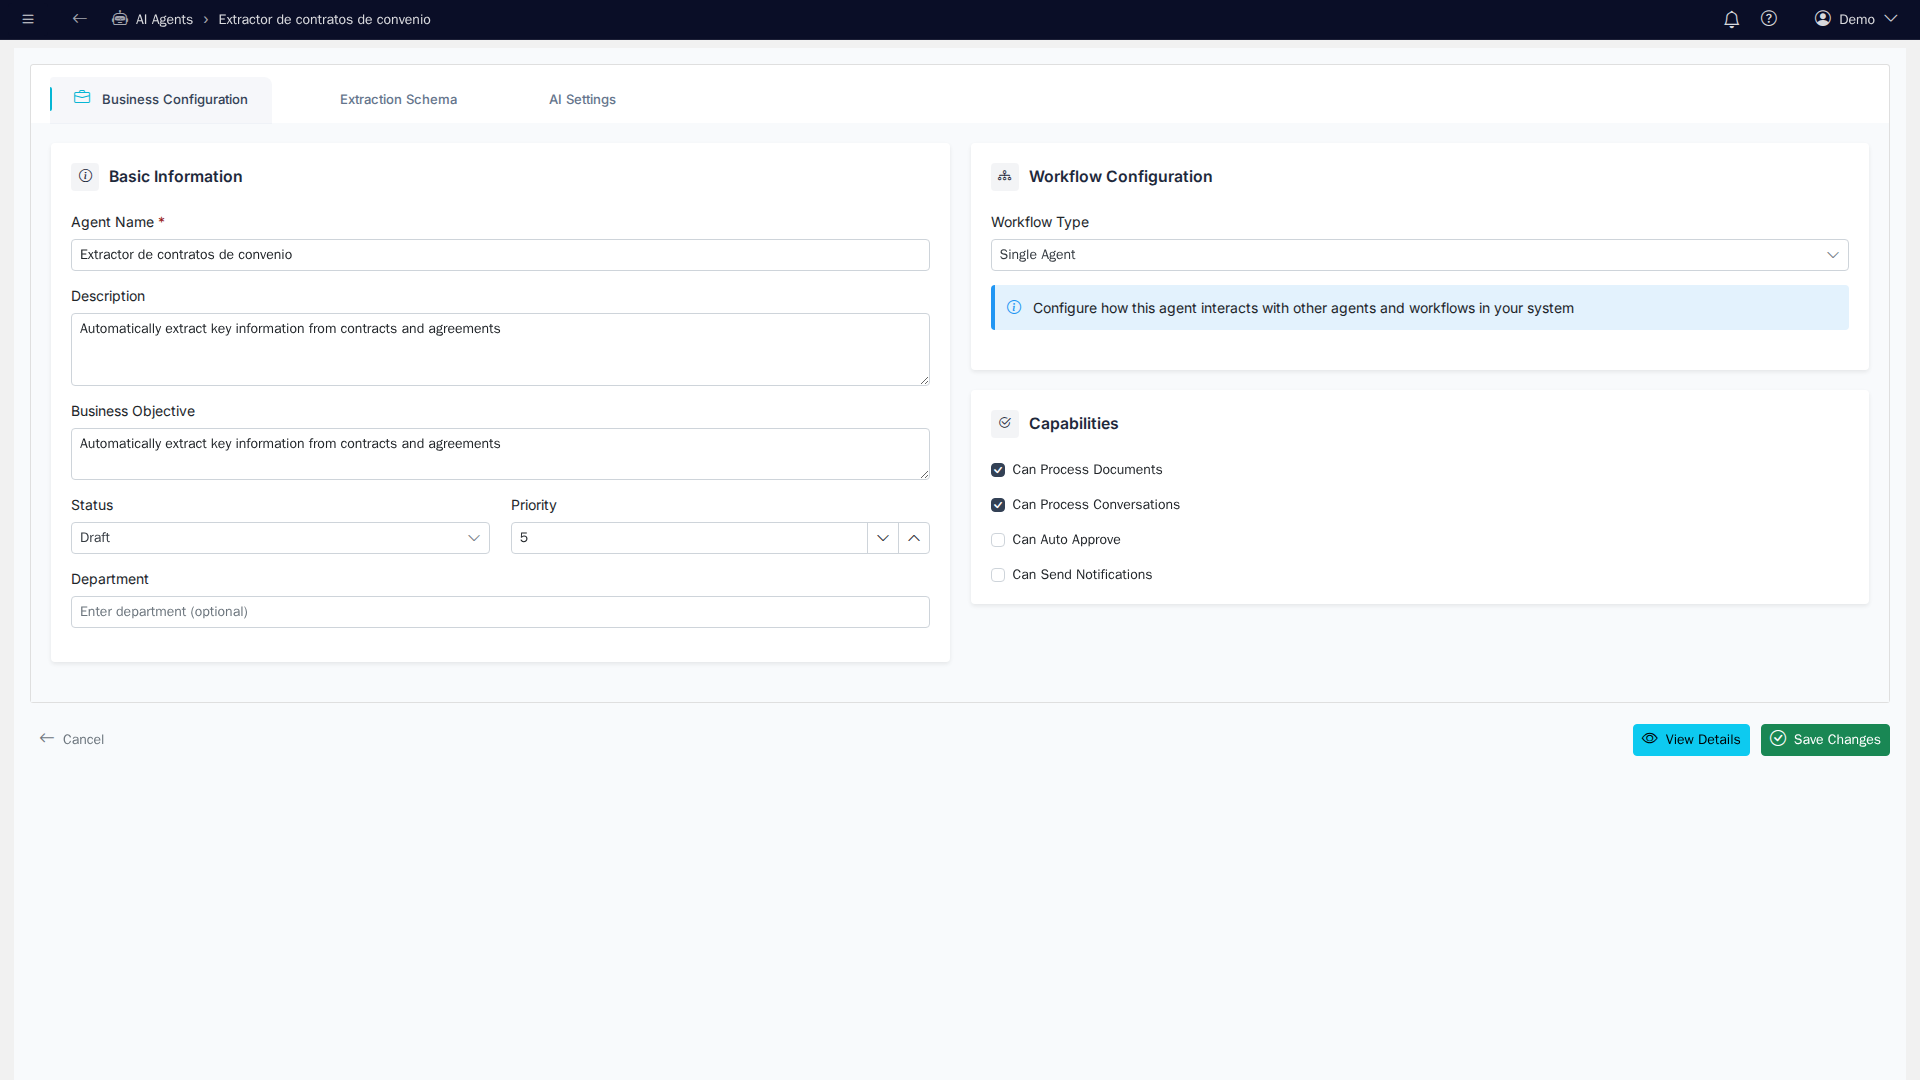
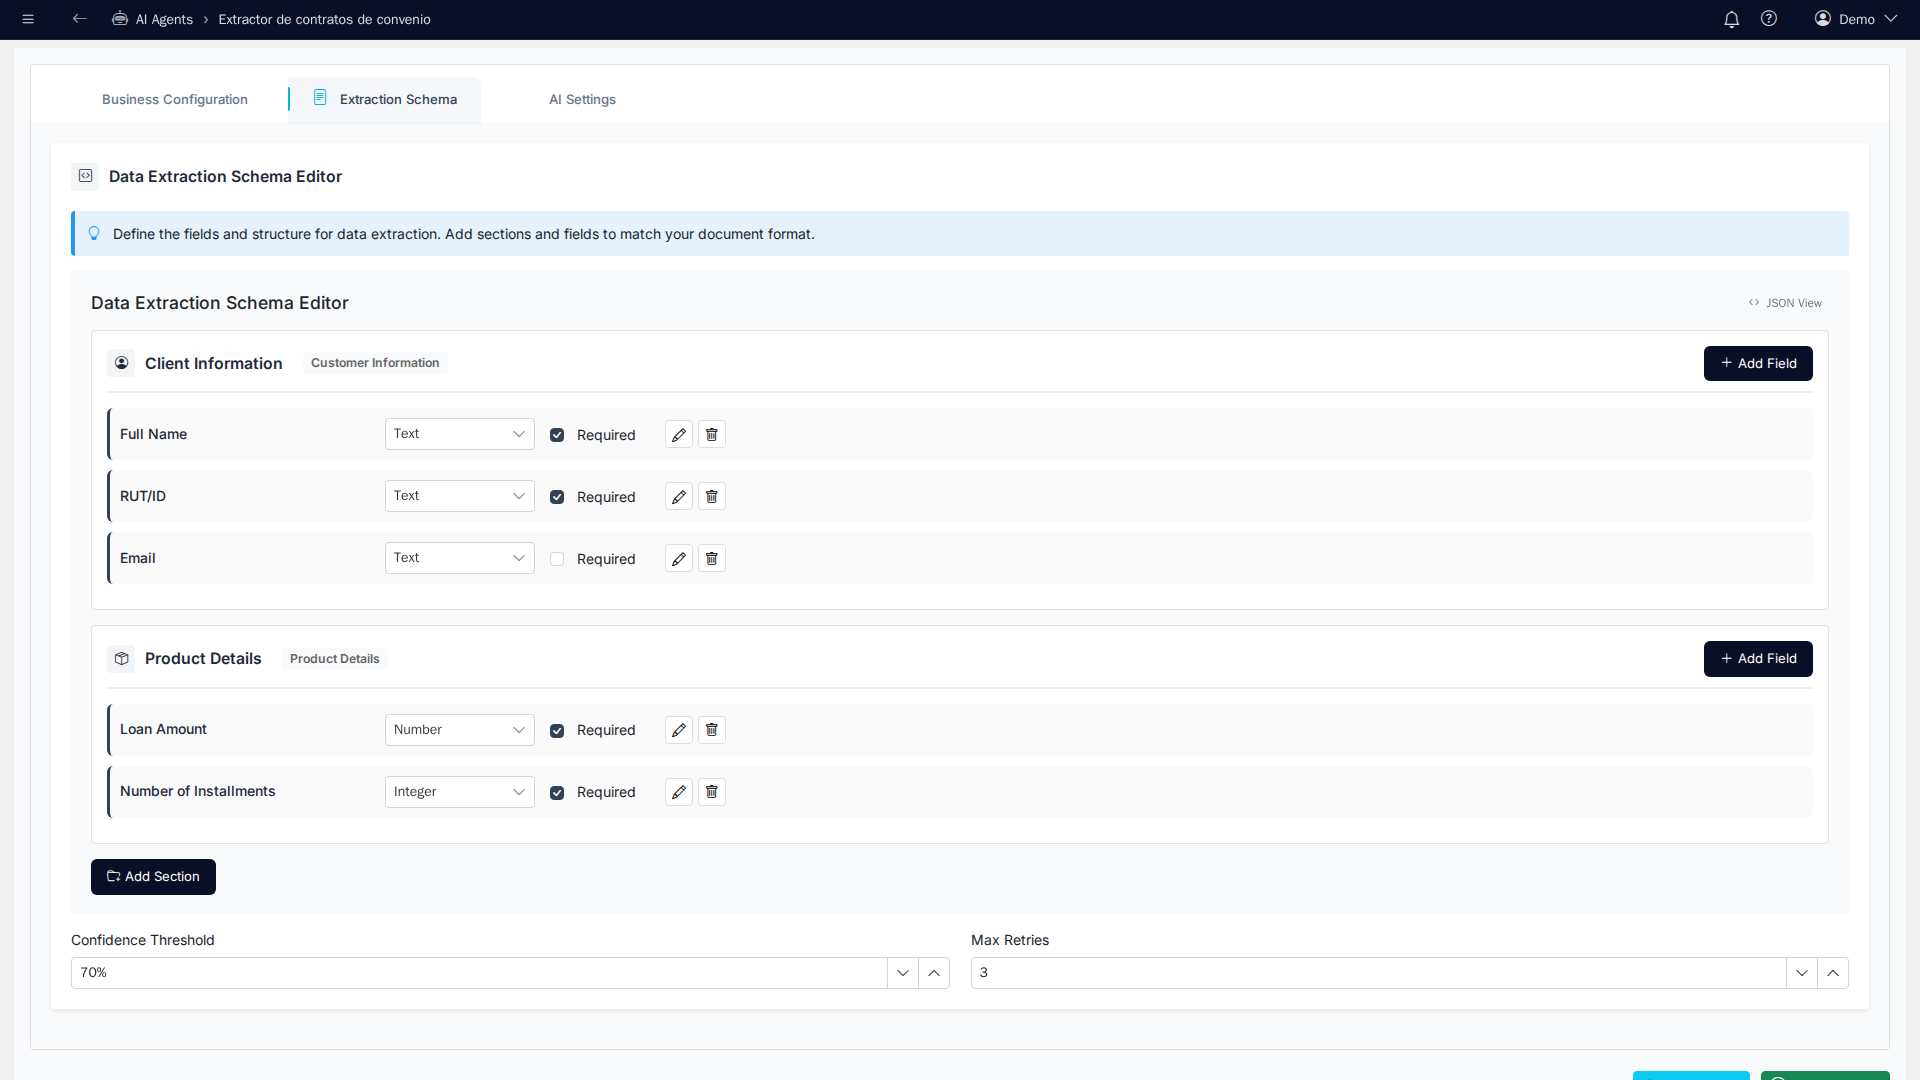
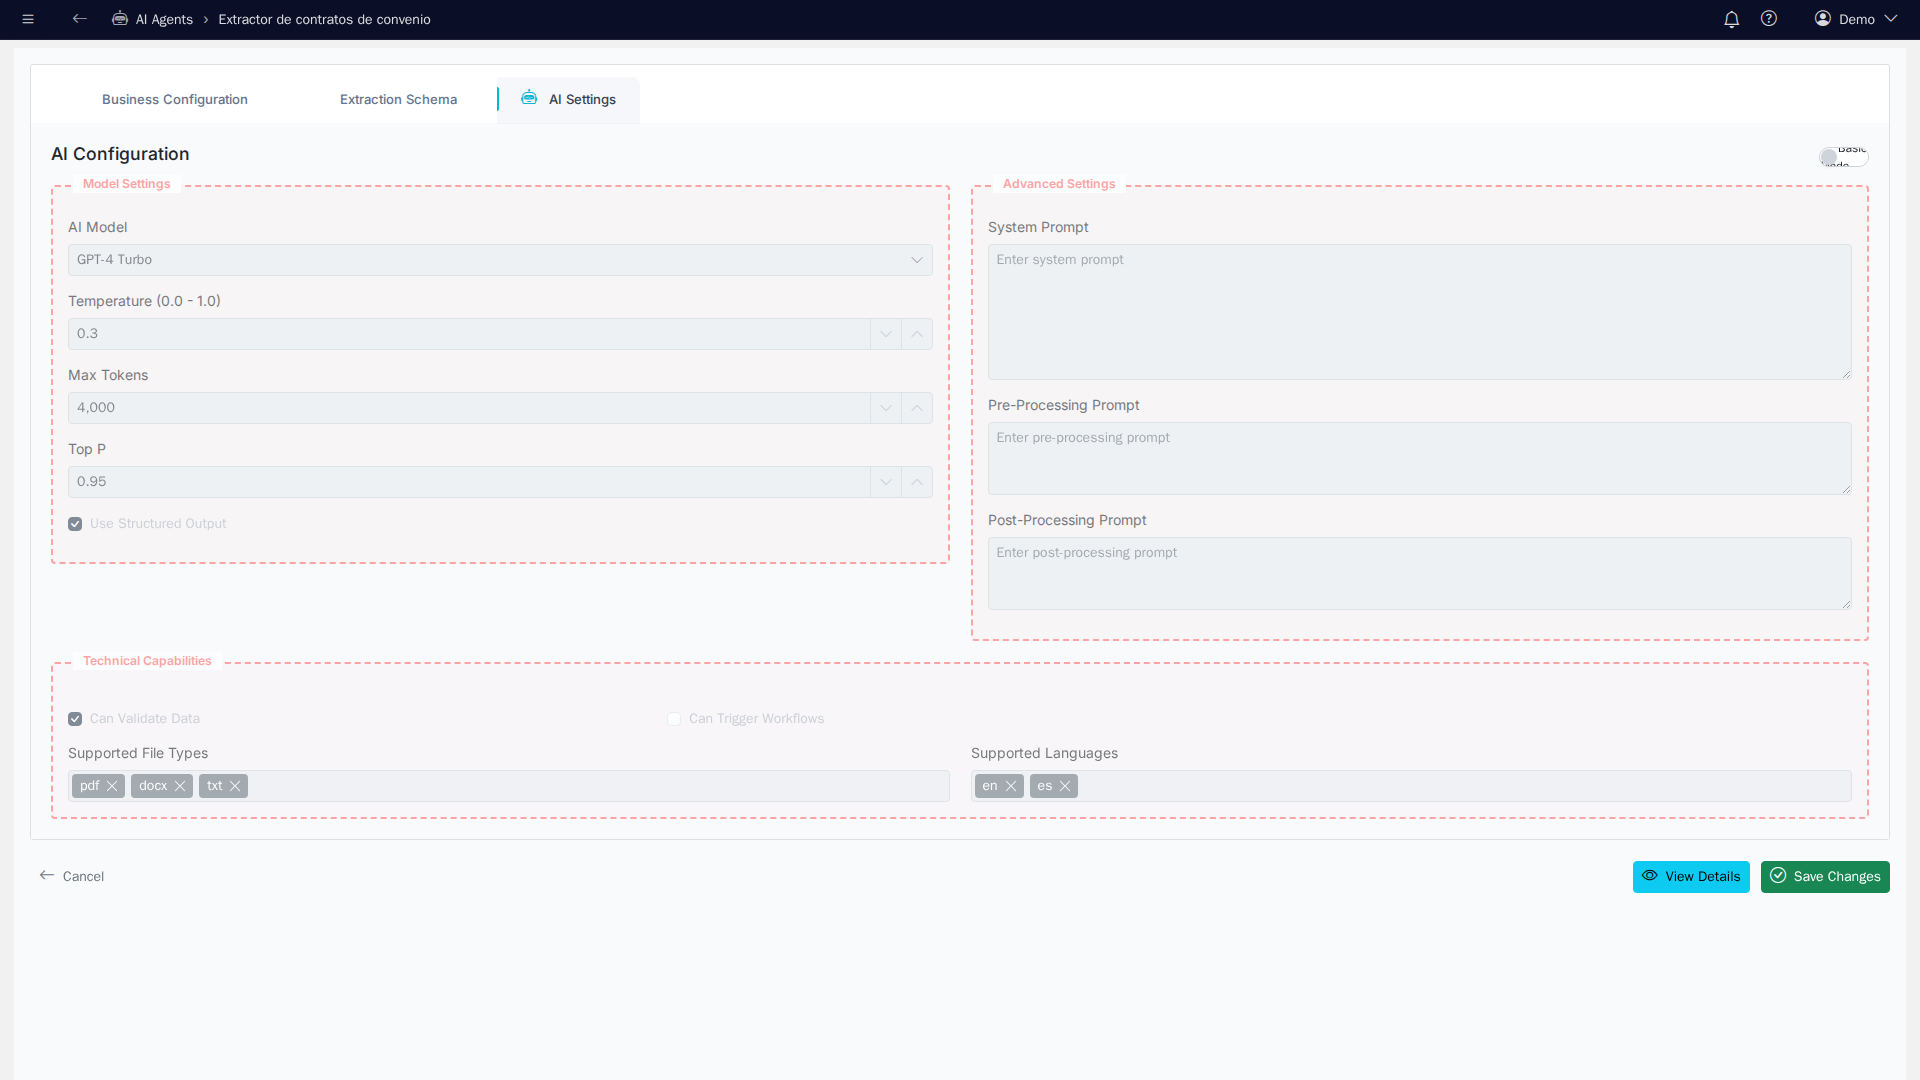
Click the pencil in the list or Edit in the details. The page has three tabs:
- Business Configuration: the name, description, objective, status, priority, department, workflow type and capabilities.
- Extraction Schema: the sections and fields the agent pulls out of each document, the confidence threshold and the maximum number of retries.
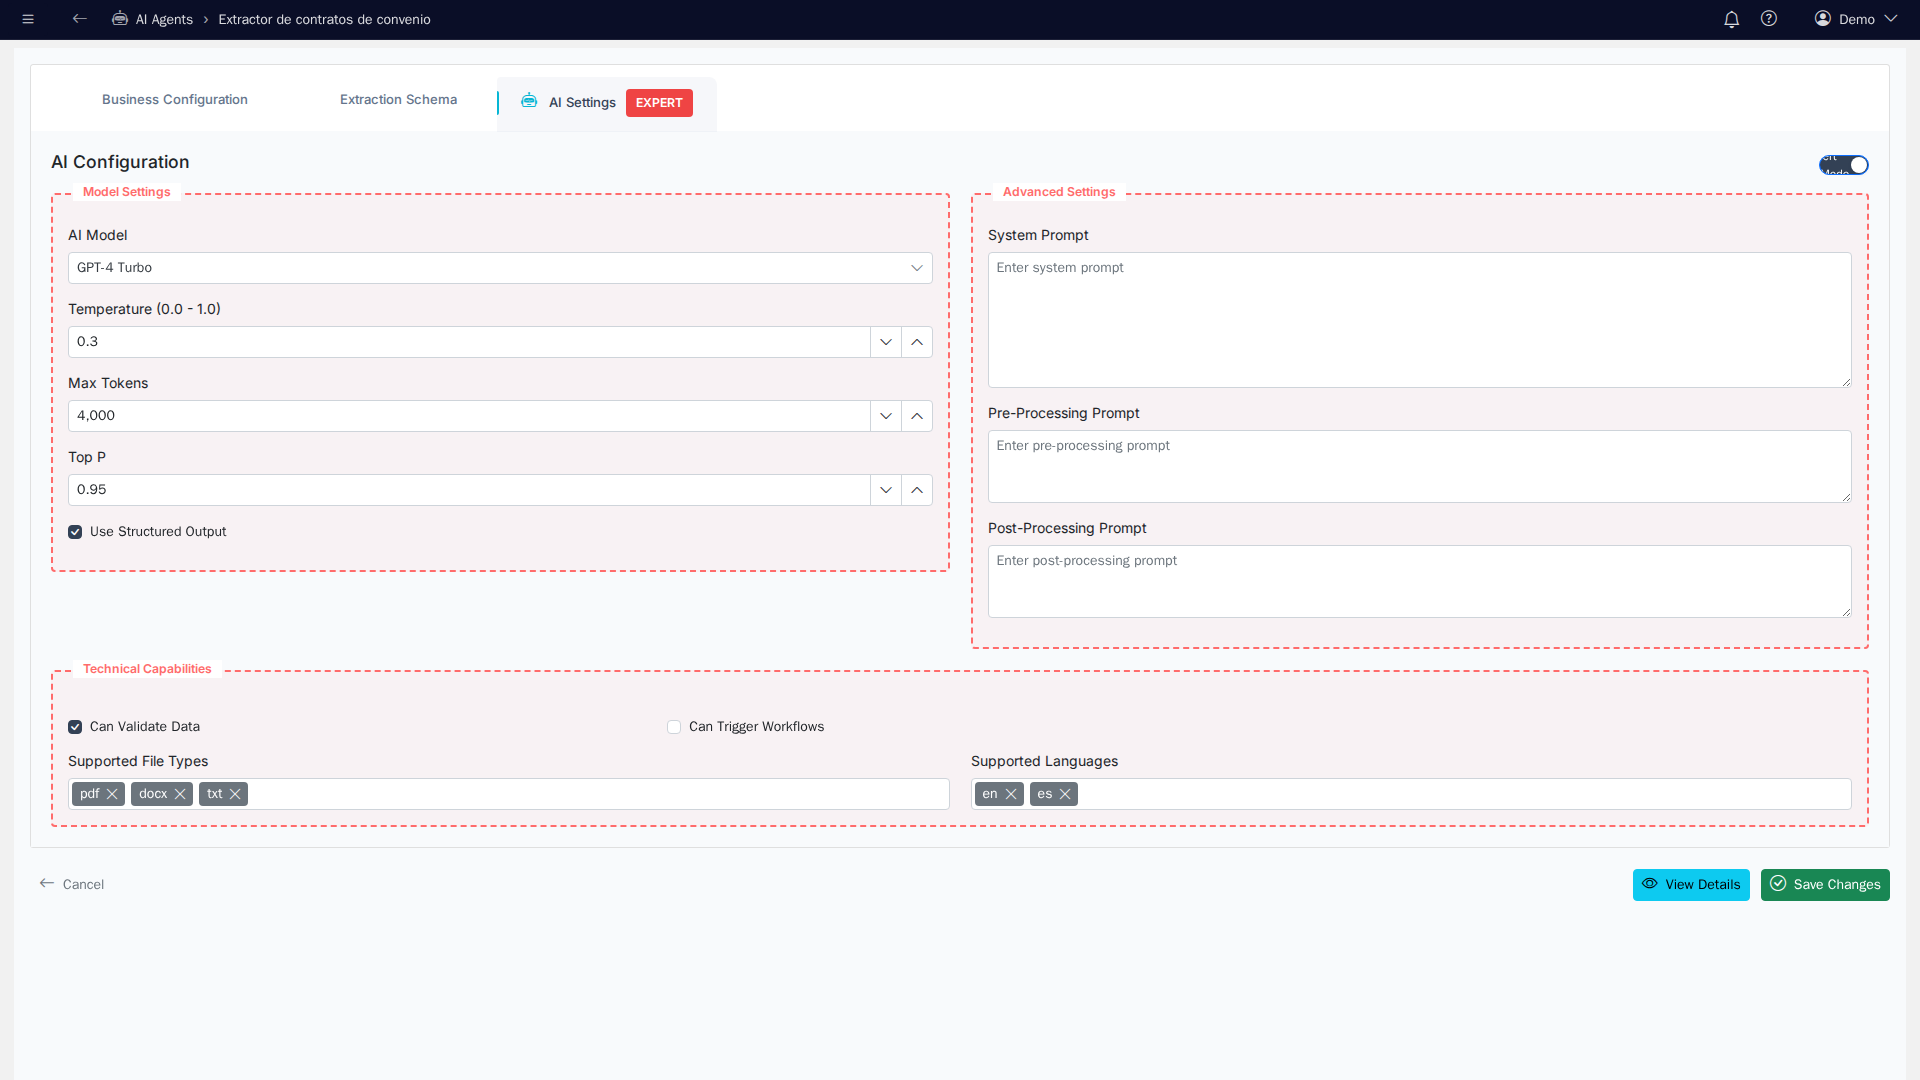
- AI Settings: the AI model and its settings, the instructions (prompts) and the file types and languages it accepts.
In AI Settings the fields are greyed out. To change them, turn on the expert mode switch at the top right.
For now, Save Changes saves the agent's name and description. Changes to the other fields and tabs are not saved yet.
Activate or delete an agent
Activate changes the agent's status to active, so it processes data. Keep the agent as a draft until your Auralytik contact confirms it is ready for your documents. An active agent shows Pause instead of Activate.
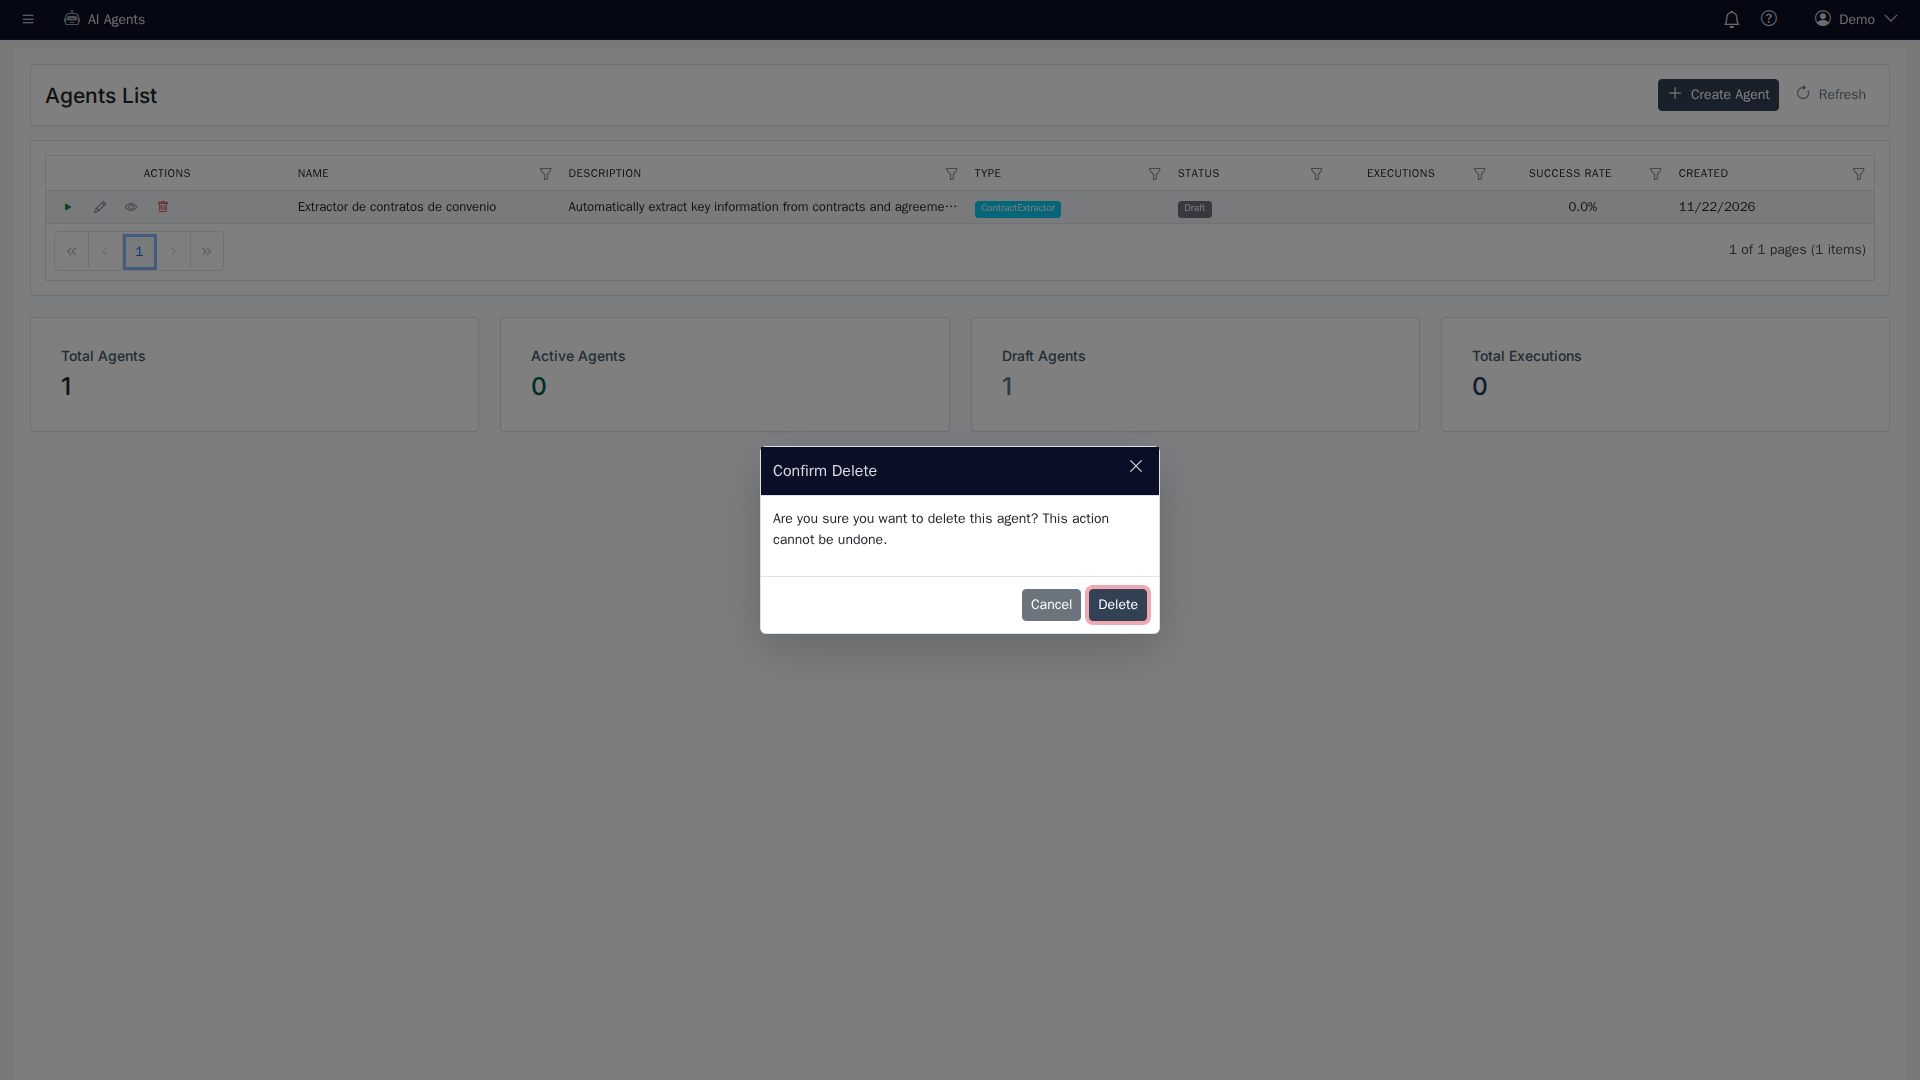
To delete an agent, click the bin in the list. A window asks you to confirm. Click Delete to remove the agent from the list, or Cancel to leave it as it is.